Quick answer
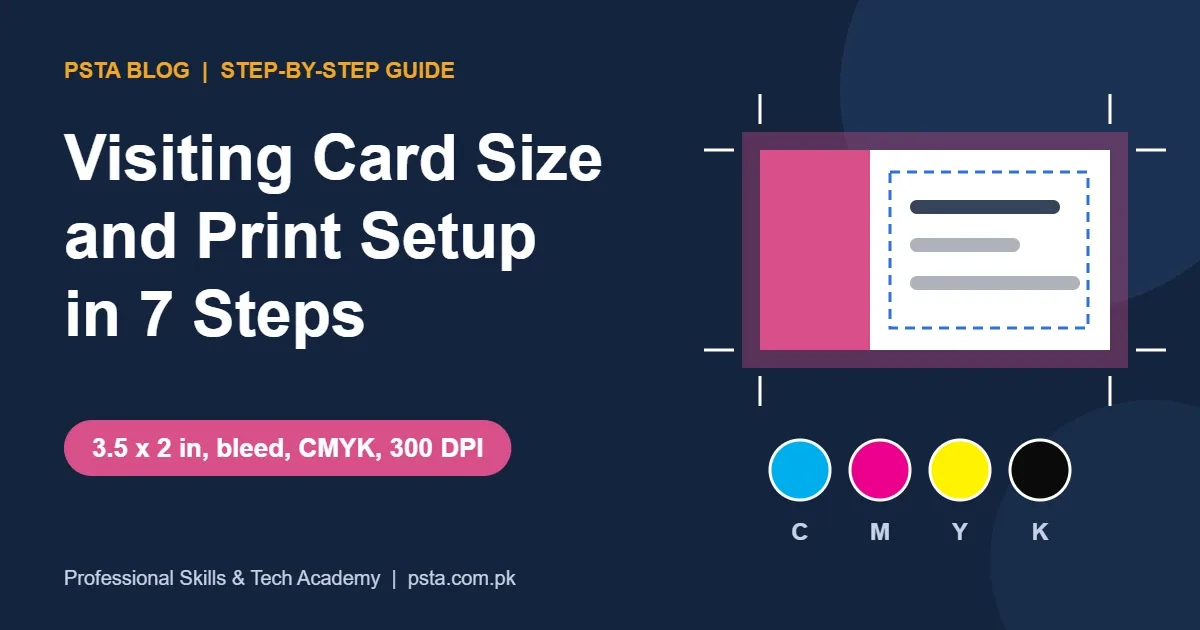
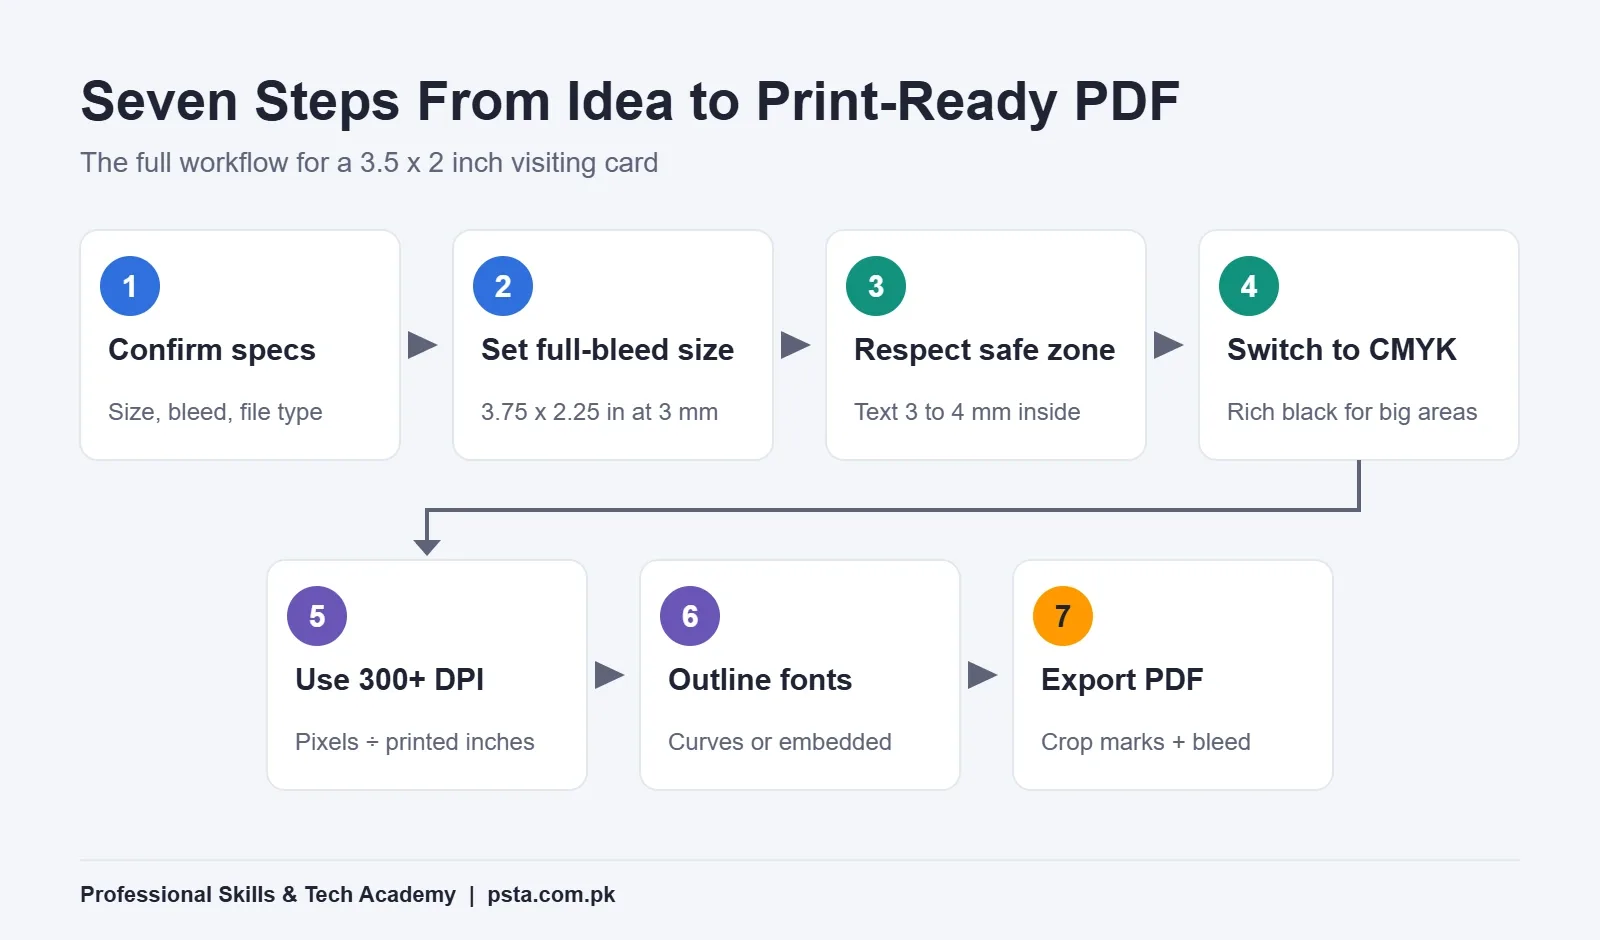
A common visiting card size is 3.5 x 2 inches (88.9 x 50.8 mm), or 1,050 x 600 pixels at 300 DPI. Add 0.1 to 0.125 inches of bleed on each side, keep text 3 to 4 mm inside the trim, design in CMYK, use 300 DPI images and export a PDF with crop marks.
Key takeaways
- • Confirm the trim size and bleed with your press first; standards differ by region and printer.
- • A 3.5 x 2 inch card with 3 mm bleed is 3.75 x 2.25 inches, or 1,125 x 675 pixels at 300 DPI.
- • Keep names, numbers and logos 3 to 4 mm inside the trim line.
- • Design in CMYK, use rich black only for large areas and 100% K for small text.
- • Check effective resolution (pixels divided by printed inches) and ask for vector logos.
- • Export a PDF with crop marks and bleed, then test-print it at 100% scale.
Table of contents 15 sections
- What Is the Standard Visiting Card Size?
- Trim, Bleed and Safe Zone in Plain Terms
- Step 1: Confirm Size, Bleed and File Type With Your Printer
- Step 2: Set Up the Document at Full-Bleed Size
- CorelDRAW
- Illustrator and InDesign
- Canva and Photoshop
- Step 3: Keep Text and Logos Inside the Safe Zone
- Step 4: Choose CMYK and Check Your Blacks
- Step 5: Which Resolution Do Photos and Logos Need?
- Step 6: Handle Fonts, Urdu Text and Double-Sided Layouts
- Step 7: Export a Print-Ready PDF With Crop Marks
- What Should You Check Before You Send the File?
- Where PSTA's Graphic Design Course Covers Print Work
- Before Your Next Order, Print One Card at Home
Here's a myth I correct in almost every print design class: if a visiting card looks sharp on your phone, it will print sharp. It won't, unless the file was built for paper. The visiting card size most printers quote is 3.5 x 2 inches (88.9 x 50.8 mm), and a print-ready file adds a little bleed on every side, uses CMYK color and keeps text clear of the cutting line.
Your phone shows colored light on a backlit screen. A press lays cyan, magenta, yellow and black ink on card stock, and then a guillotine trims a whole stack of sheets that never cuts in exactly the same spot. A file that ignores those facts comes back with dull blues, white slivers at one edge or a phone number sliced in half.
Work through this guide and you'll come away with:
- The common visiting card size in inches, millimeters and pixels, plus the sizes used in other regions
- What trim, bleed and safe zone mean, and how much room to give each one
- Setup tips for CorelDRAW, Illustrator, InDesign, Canva and Photoshop
- The color, resolution and font settings that prevent reprints
- A short pre-flight check to run before any file goes to a press
What Is the Standard Visiting Card Size?
There isn't one global size. It depends on the region, and most printers publish their own template. Vistaprint's business card dimensions guide lists 3.5 x 2 inches for the US and Canada and 85 x 55 mm for the UK and Europe, and it calls these conventions rather than universal rules. Presses in Pakistan don't follow a single published standard either, so ask for the exact trim size before you open any software. The table below shows the visiting card size each region commonly uses.
| Region or format | Trim size (mm) | Trim size (inches) |
|---|---|---|
| US and Canada | 88.9 x 50.8 | 3.5 x 2 |
| UK and Europe | 85 x 55 | 3.35 x 2.17 |
| Japan | 91 x 55 | 3.58 x 2.17 |
| Australia | 90 x 55 | 3.54 x 2.17 |
| China | 90 x 54 | 3.54 x 2.13 |
| ATM and ID cards (ISO ID-1, for comparison) | 85.60 x 53.98 | 3.370 x 2.125 |
The last row isn't a visiting card at all. It's the ID-1 format from ISO/IEC 7810, used by payment cards, driving licences and many national ID cards. It's a handy reference because wallet slots are built around it. A 3.5 x 2 inch card is about 3 mm wider and 3 mm shorter than your ATM card, so it fits the same pocket.
The examples in the rest of this guide use a visiting card size of 3.5 x 2 inches. If your press works in 85 x 55 mm, every step stays the same and only the numbers change.
Trim, Bleed and Safe Zone in Plain Terms
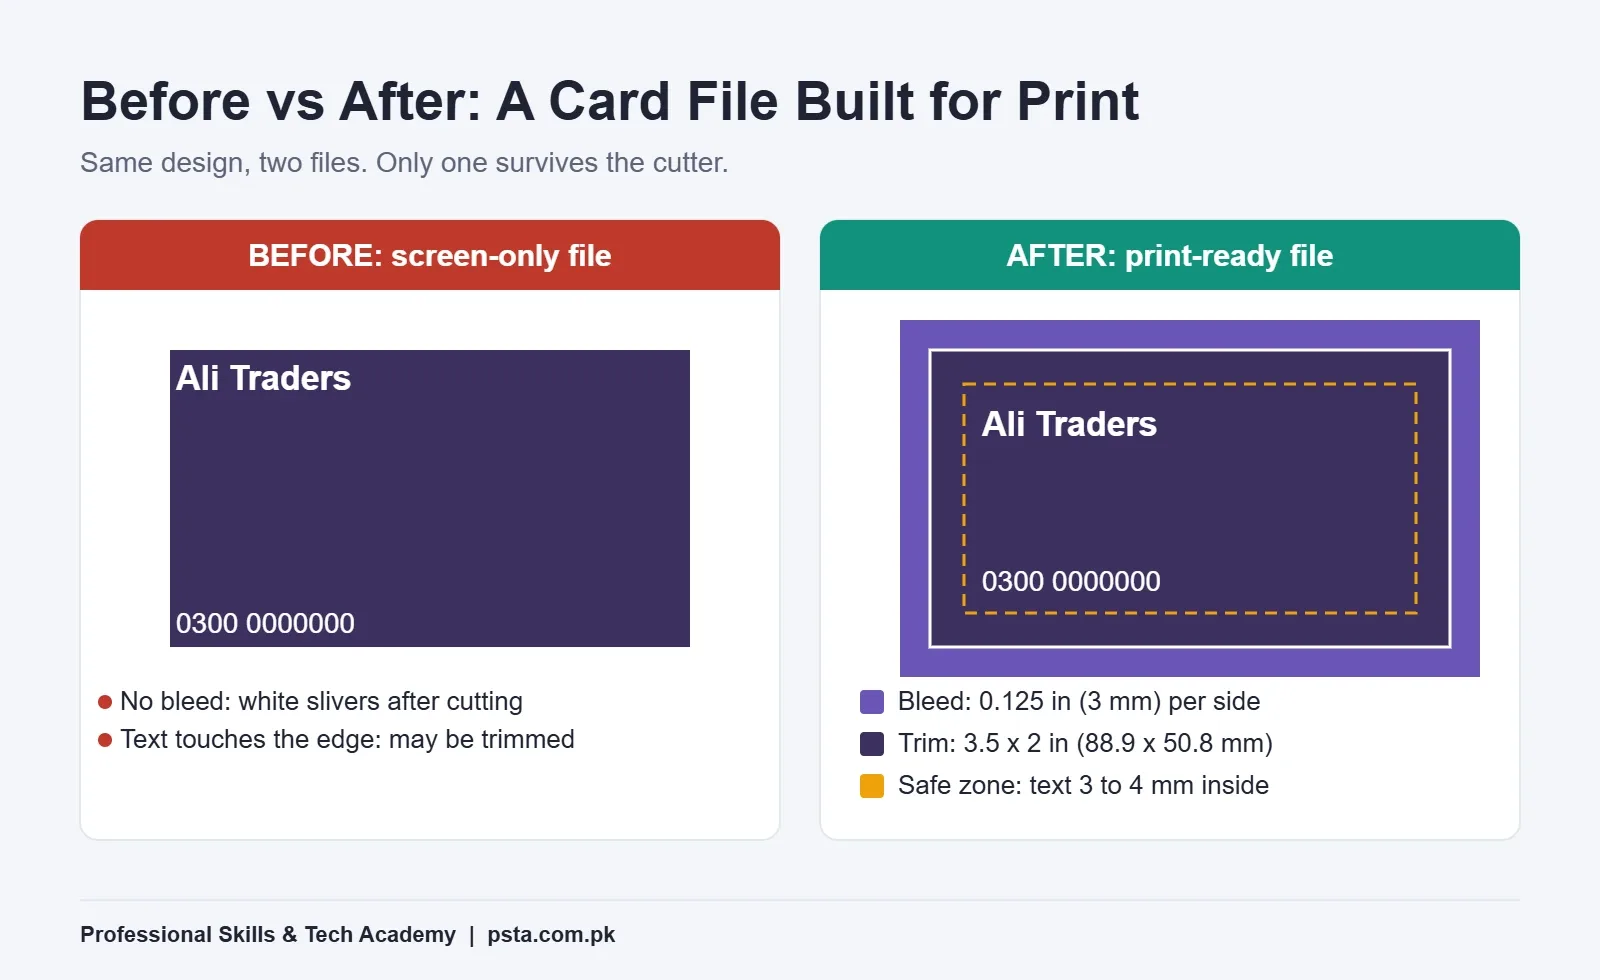
Every print file has three boxes nested inside each other. Once you see them, most printing problems start to make sense.
- Trim line: the finished size of the card, where the blade is meant to cut.
- Bleed: extra background that runs past the trim line. Adobe's InDesign bleed guide describes it as making the design slightly larger than the finished print so the excess can be trimmed away and color reaches the paper's edge.
- Safe zone: an inner margin. Names, numbers and logos live inside it so a slightly off cut never touches them.
Why the extra space? A cutter trims hundreds of cards at once, and the stack can shift by a hair. Bleed hides that shift on the outside; the safe zone protects your text on the inside.
Vistaprint's numbers show how small these margins are. Its 3.5 x 2 inch card uses a full-bleed artwork size of 3.61 x 2.11 inches and a safe printing area of 3.36 x 1.86 inches. That puts the safe edge only 0.07 inches, roughly 1.8 mm, inside the trim. In class I ask students to leave more breathing room than the minimum, about 3 to 4 mm, because a tight margin looks cramped even when the cut is perfect.
Step 1: Confirm Size, Bleed and File Type With Your Printer
Bleed isn't the same everywhere, and neither is the visiting card size each press expects. This is where most beginners lose a reprint. Compare what three official sources say:
- Adobe's InDesign guide calls 0.125 inches (3 mm) standard and notes that some providers want more.
- GotPrint's file preparation page asks for 0.1 inches on most business cards and 0.325 inches on round-corner cards.
- CorelDRAW's help on printer's marks says a bleed limit of 0.125 to 0.25 inches is usually enough.
So before you design, send the press five short questions on WhatsApp:
- What is the exact trim size?
- How much bleed do you want on each side?
- Which file type do you prefer: PDF, CDR or AI?
- Do you want crop marks on the file?
- Will you send a proof before printing the full quantity?
If the press can't answer, set 3 mm of bleed. It covers the most common requirement, and extra background costs you nothing.
Step 2: Set Up the Document at Full-Bleed Size
You can work in two ways. Either set the document to the trim size and add bleed in the software's bleed settings, or make the canvas the full-bleed size and mark the trim with guides. Vector tools handle the first method well. Photoshop and Canva users usually rely on the second.
Pixel sizes follow one formula: inches multiplied by DPI. At 300 DPI, 3.5 inches becomes 1,050 pixels, so the visiting card size in pixels is 1,050 x 600 before you add bleed.
| Setup for a 3.5 x 2 inch card | Inches | Millimeters | Pixels at 300 DPI |
|---|---|---|---|
| Trim size only | 3.5 x 2 | 88.9 x 50.8 | 1,050 x 600 |
| Vistaprint full-bleed file | 3.61 x 2.11 | 91.7 x 53.6 | 1,083 x 633 |
| 0.1 inch bleed on each side | 3.7 x 2.2 | 94.0 x 55.9 | 1,110 x 660 |
| 0.125 inch (3 mm) bleed on each side | 3.75 x 2.25 | 95.3 x 57.2 | 1,125 x 675 |
CorelDRAW
For a CorelDRAW visiting card, set the page to the trim size, then draw every background shape or photo past the page border by your bleed amount. CorelDRAW's help places the Bleed limit setting under File > Print, on the Layout tab, so check it there before you print or prepare output.
Illustrator and InDesign
Enter the trim size as the document size and type the bleed separately. In InDesign, Adobe's steps are Create new, the Print tab, then Bleed and Slug in Preset Details. You can change it later through File > Document Setup. Illustrator also offers Generative Expand, which Adobe documents as a way to fill the print bleed area when a photo stops at the artboard edge.
Canva and Photoshop
Create a custom canvas at the full-bleed size from the table, or at trim size if you'll add bleed on export in Canva. In Photoshop, set the resolution to 300 and add guides 37.5 pixels in from each edge for a 0.125 inch bleed. Stretch background colors and photos right to the outer edge.
Step 3: Keep Text and Logos Inside the Safe Zone
With a 3 mm bleed file, you'll have two sets of guides: one at 3 mm from the file edge (the trim) and another 3 to 4 mm further in (your safe margin). Everything a customer needs to read sits inside the inner guides, whatever visiting card size you're working with.
A few habits help:
- Avoid thin borders close to the edge. If the cut drifts by a millimeter, the frame looks uneven on one side, and buyers notice that straight away.
- Give the phone and WhatsApp number its own line. It's the detail people use most, so keep it away from busy patterns and photos.
- Keep bilingual layouts balanced. If the name appears in Urdu and English, give each script its own block rather than squeezing both onto one line.
- Check legibility at real size. Zoom to 100% or print a test before you trust small text. I rarely let students set a phone number smaller than 7 pt, though your typeface matters more than any single number.
Step 4: Choose CMYK and Check Your Blacks
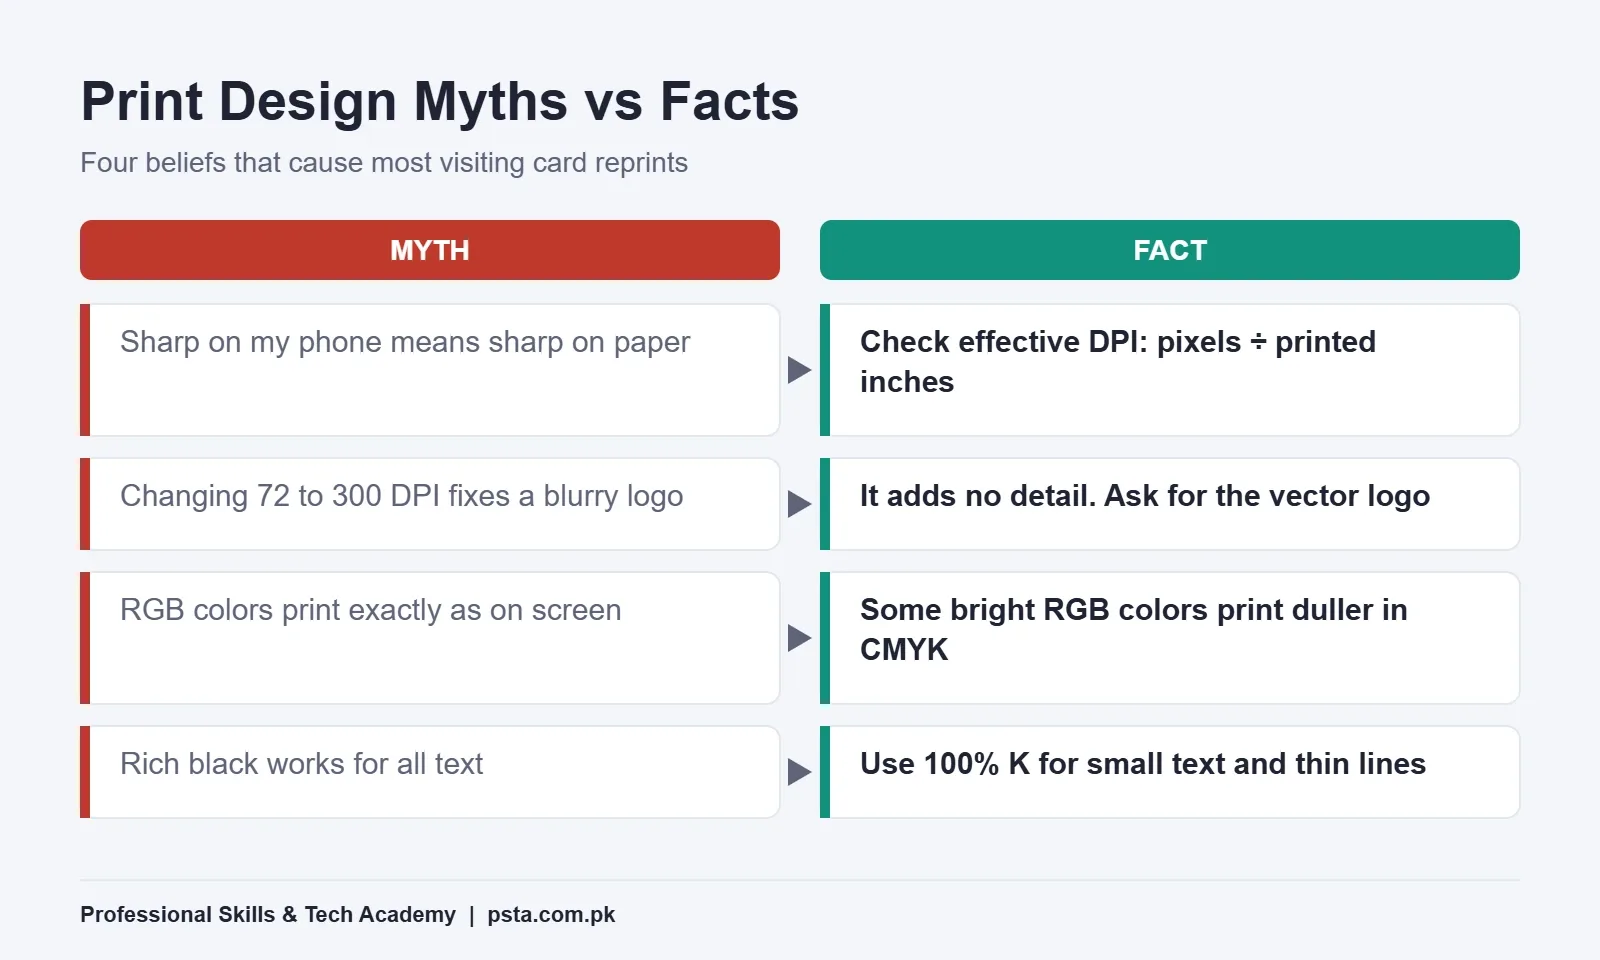
Screens mix red, green and blue light (RGB). Presses mix cyan, magenta, yellow and black ink (CMYK). Some bright RGB greens, blues and oranges simply can't be reproduced with ink, so they print duller than you expect. Designing in CMYK from the start shows you that shift early, while you can still adjust. So if you are weighing CMYK vs RGB for a print job, the answer is CMYK.
GotPrint accepts CMYK or RGB depending on the product and recommends the GRACol2006_Coated1v2 color profile. It also points out that PNG files don't support CMYK, which is a good reason not to send a PNG to a press.
Black needs special care. A large black background printed with black ink alone can look slightly gray, so printers often recommend "rich black," which adds other inks underneath. GotPrint's suggested values are:
- Coated stock: C60 M40 Y40 K100, or C30 M30 Y30 K100
- Uncoated stock: C20 M20 Y20 K100
Use rich black for big solid areas only. For small text and thin lines, plain 100% black is the safer choice, because four inks have to line up perfectly to keep tiny letters crisp.
Step 5: Which Resolution Do Photos and Logos Need?
Vistaprint asks for 300 DPI raster artwork. GotPrint asks for 350 DPI at 100% of the final print size on standard products and 150 DPI on signage. For a visiting card, aim for at least 300.
The useful calculation is effective resolution: image pixels divided by the printed size in inches. Suppose a client sends a logo copied from their Facebook page that's 400 pixels wide:
- Printed 1 inch wide: 400 ÷ 1 = 400 DPI. Fine.
- Printed 2 inches wide: 400 ÷ 2 = 200 DPI. Soft edges, especially on text inside the logo.
Changing the DPI box from 72 to 300 in Photoshop doesn't add detail. It only changes how large the image prints. Ask the client for the original vector logo (AI, CDR, EPS, SVG or a vector PDF), or redraw a simple logo in Illustrator or CorelDRAW. Vectors have no fixed resolution, so they stay sharp at any size.
Step 6: Handle Fonts, Urdu Text and Double-Sided Layouts
Fonts cause quiet problems. If the press opens your CDR or AI file on a computer without your typeface, the software swaps in another one and your layout shifts. Convert text to curves (CorelDRAW) or outlines (Illustrator) on a copy of the final file, or export a PDF that embeds the fonts. Keep the editable version for future changes.
Urdu text needs one more check. If a name was set in InPage, place it as a high-resolution graphic or a PDF rather than retyping it in another program. Then zoom in and confirm every dot and joining stroke survived. A missing nuqta can change a name, and that's an embarrassing reprint.
For double-sided cards:
- Use the same size and the same bleed on both sides.
- Put the front on page 1 and the back on page 2 of a single PDF.
- For vertical backs, ask the printer which way up the back should be relative to the front.
- For round corners, check the radius in the template. Vistaprint uses a quarter-inch radius, and GotPrint wants 0.325 inches of bleed on round-corner cards.
Step 7: Export a Print-Ready PDF With Crop Marks
GotPrint calls PDF its most preferred pre-press format, and most presses agree. Crop marks are the small lines outside the bleed that show the cutter where to trim. Here are the export paths from each program's own documentation:
- InDesign: File > Export, choose Adobe PDF (Print), then in Marks and Bleeds tick Crop Marks and Use Document Bleed Settings.
- CorelDRAW: in File > Print, open the Prepress tab and turn on Crop/fold marks. Corel notes that the paper must be 0.5 inches larger than the page on all sides for the marks to fit.
- Canva: according to Utah State University's Canva print guide, use Share > Download, set the file type to PDF Print, tick Crop marks and bleed and Flatten PDF, and set the color profile to CMYK if your account shows that option.
Open the exported PDF once before sending it. Check that the background runs past the crop marks, the text sits well inside them, and both pages are in the right order.
What Should You Check Before You Send the File?
Run this pre-flight list every time. It takes five minutes and catches most of the faults that lead to reprints.
- Trim size matches the visiting card size the press confirmed.
- Background color or photo reaches the outer bleed edge on all four sides.
- No text or logo sits outside the safe margin.
- Document is in CMYK, and large blacks use the press's rich black.
- Every photo has an effective resolution of 300 DPI or more.
- Fonts are converted to curves or embedded in the PDF.
- Phone number, email and spelling are checked digit by digit, ideally by the client.
- File has a clear name, such as ali-traders-card-front-back.pdf.
For a large order, ask for a proof. A single sample card costs far less than a box of cards with the wrong number.
Where PSTA's Graphic Design Course Covers Print Work
Print setup is part of the syllabus in PSTA's Graphic Designing course, not an afterthought. Week 4 covers CorelDRAW print layouts and brochures, Week 6 covers Urdu posters and flyers in InPage, and Week 7 is given to poster, business card and book cover projects. The brand identity project includes a logo, business card and letterhead presented in mockups.
The course is beginner level and runs for 12 weeks. The listed fee is Rs. 18,000 (regular fee Rs. 20,000), payable in two installments. You can sit in class at our Abbottabad campus in Mandian, just across Old College Road from FIMS College, follow the same lessons live from another city, or split your weeks between the two. For current batch timings, a WhatsApp message to +92 314 5424399 gets a quick reply.
If you also want to sell design services, the Digital Marketing course and the Video Editing course pair well with design. Still choosing your first program? Our guide to graphic design software for beginners compares the options, and the post on graphic design portfolio mistakes shows how to present print samples to clients. You can see every program on the courses page, and the admission form takes a few minutes when you're ready.
Before Your Next Order, Print One Card at Home
Take your exported PDF, print it on plain A4 at 100% scale (not "fit to page"), and cut along the crop marks with a ruler and blade. Hold it next to your ATM card. Can you read the phone number at arm's length? Is any text crowding the edge? That one paper test checks the visiting card size, the margins and the text together, and it tells you more about your file than another hour on screen.
Frequently asked questions
What is the visiting card size in pixels for Photoshop?
At 300 DPI, a 3.5 x 2 inch card is 1,050 x 600 pixels at trim size. If your printer wants 0.125 inches (3 mm) of bleed on each side, make the canvas 1,125 x 675 pixels and keep text well inside the 1,050 x 600 area. Some printers ask for 350 DPI, so check their template first.
Is 3.5 x 2 inches the same as 9 x 5 cm?
Not exactly. 3.5 x 2 inches equals 88.9 x 50.8 mm, so it is close to 9 x 5 cm but not identical. The 1 mm difference matters when a press cuts a full sheet of cards. Ask the printer which size their cutter is set to and build your file to that exact number.
What is bleed in visiting card printing?
Bleed is extra background that extends past the final cut line. Cards are trimmed in stacks, and the blade can shift slightly. With bleed, that shift cuts into spare color instead of leaving a white sliver. Common values are 0.1 to 0.125 inches (about 2.5 to 3 mm) per side.
Should I design a visiting card in Canva or CorelDRAW?
Both can produce a print-ready file. Canva is quicker for simple layouts and can download a PDF Print file with crop marks and bleed. CorelDRAW gives finer control over bleed, crop marks and color, and many local presses can open CDR files directly. Learn both if you plan to take print jobs.
Can I send a JPG or PNG to the printer?
Many printers accept JPG, but PDF is usually preferred because it keeps vector text sharp and can hold crop marks and bleed. Avoid PNG for print, since PNG files do not support CMYK color. If you must send an image, export it at full-bleed size and at least 300 DPI.
Why do my printed colors look duller than on screen?
Screens create color with light in RGB, while presses use CMYK ink on paper. Some bright greens, blues and oranges fall outside what ink can reproduce, so they print flatter. Designing in CMYK from the start, and asking for a printed proof, shows you the real result before the full order.
Sources & references
- Business Card Size Guide (Vistaprint) vistaprint.com
- Preparing Print Files (GotPrint) gotprint.com
- Set Print Bleed in InDesign (Adobe Help) helpx.adobe.com
- Generate Print Bleed in Illustrator (Adobe Help) helpx.adobe.com
- Printer's Marks (CorelDRAW Help) product.corel.com
- Canva File Prep for Print (Utah State University) usu.edu
- ISO/IEC 7810 Card Formats (Wikipedia) en.wikipedia.org
Last reviewed & updated on by Umar Qureshi. Written by the PSTA team in Abbottabad, Pakistan.

Umar Qureshi

Ultimate Graphic Designing Course in Pakistan: Master Photoshop, Illustrator, CorelDRAW & AI Tools (Practical & Beginner Friendly)
Turn this guide into a career: hands-on training with real projects, online across Pakistan or on-campus in Abbottabad · 12 Weeks.


Comments
No comments yet — ask a question or share your experience.