Quick answer
Video editing terms describe each step from raw footage to final file. Learn timeline basics (clip, bin, track, playhead), cut types such as J-cuts and L-cuts, color correction versus grading, audio levels, keyframes and export settings. For YouTube, export MP4 with H.264 at your recorded frame rate, using 8 Mbps for 1080p at 24 to 30 fps.
Key takeaways
- • Clips live in bins, and the timeline stacks them on video and audio tracks.
- • J-cuts and L-cuts let sound lead or trail the picture, which makes interviews flow.
- • Color correction fixes problems first; color grading sets the mood afterward.
- • YouTube recommends MP4, H.264 and 8 Mbps for 1080p uploads at 24 to 30 fps.
- • DaVinci Resolve has a free version, while Premiere Pro costs $22.99 a month on an annual plan (US price).
- • Video editing ranked second among Design and Creative skills in Upwork's 2026 demand list.
Table of contents 19 sections
- Basic Video Editing Terms for Projects and Timelines
- Footage, Clip and Bin
- Timeline, Track and Playhead
- In Point, Out Point and Trim
- What Are the Most Common Video Editing Terms for Cuts?
- B-Roll and A-Roll
- Workflow Terms: From Ingest to Picture Lock
- Frame and Format Terms That Decide How Your Video Looks
- Frame Rate
- Resolution
- Aspect Ratio
- Color Terms: Correction Comes Before Grading
- Audio Terms Every Editor Uses Daily
- Effects Terms: Keyframes, Keying and Compositing
- How Do Export Settings Work?
- Do Premiere Pro and DaVinci Resolve Use the Same Words?
- Where These Skills Lead in Pakistan
- Learn Video Editing With PSTA
- Practice Task: Label a 60-Second Edit
Video editing terms are the shared words editors, clients and software use to describe every step from raw footage to the final file. You can learn the core set in a weekend. Here's a quick test of why they matter: YouTube recommends an 8 Mbps bitrate for a 1080p upload at 24 to 30 fps, according to its official upload encoding guide. If that sentence felt like code, this glossary will fix it.
I teach these words in the first week of every editing batch, before students touch the timeline. They make tutorials easier to follow, client briefs easier to read and mistakes easier to search for.
Here's what this glossary covers:
- The project and timeline words you'll hear in every tutorial
- The names of common cuts, and when each one works
- Color, audio and effects terms in plain English
- Export settings, with YouTube's own recommended numbers
- How Premiere Pro and DaVinci Resolve name the same things differently
Basic Video Editing Terms for Projects and Timelines
These are the first video editing terms most tutorials assume you know. Every editing app is built around the same few objects. Once these click, switching between apps becomes much easier.
Footage, Clip and Bin
Footage is the raw video you recorded. A clip is one piece of that footage, or a trimmed part of it, inside your project. A bin is a folder inside the project that holds clips. Good editors sort bins by type, such as interviews, B-roll, music and graphics.
Timeline, Track and Playhead
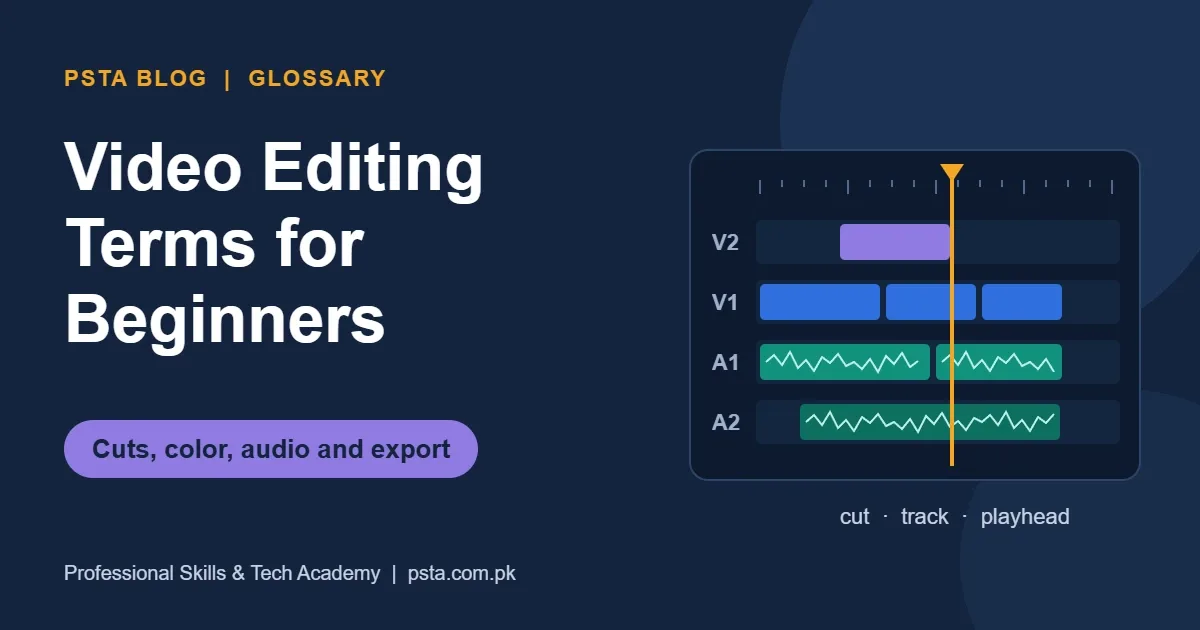
The timeline is where you arrange clips in time, from left to right. It has stacked tracks: video tracks on top and audio tracks below. A clip on a higher video track covers the clips beneath it. The playhead is the vertical line that marks the frame you're viewing.
In Point, Out Point and Trim
An in point marks where you want a clip to start. An out point marks where it ends. Trimming means moving those edges to tighten a shot. Most of an editor's day is trimming, not adding effects.
What Are the Most Common Video Editing Terms for Cuts?
A cut is the point where one shot ends and the next begins. The type of cut changes how the viewer feels the moment.
- Hard cut: a direct switch from one shot to the next. It's the default, and it's invisible when done well.
- Jump cut: a cut inside the same shot that skips time. Talking-head YouTube videos use it to remove pauses.
- J-cut: you hear the next shot's audio before you see it. The audio track forms the lower hook of a "J" on the timeline.
- L-cut: the opposite. The picture changes, but the previous audio keeps playing. Interviews use it constantly.
- Match cut: two shots joined by a similar shape, movement or sound, such as a closing door cutting to a closing book.
- Cutaway: a short shot of something else, inserted to hide a jump or show what the speaker means.
A transition is any effect between two clips, such as a cross dissolve or a fade to black. Use them for a reason, like showing time passing. A wedding film with a star wipe on every cut tells clients you're new.
B-Roll and A-Roll
A-roll is your main footage, usually the person talking. B-roll is supporting footage laid over it: product close-ups, street shots or screen recordings. For a Peshawar restaurant promo, the owner's interview is A-roll and the sizzling karahi is B-roll.
Workflow Terms: From Ingest to Picture Lock
Professional editing follows a fixed order. Knowing the names of the stages helps you quote timelines and talk to clients clearly.
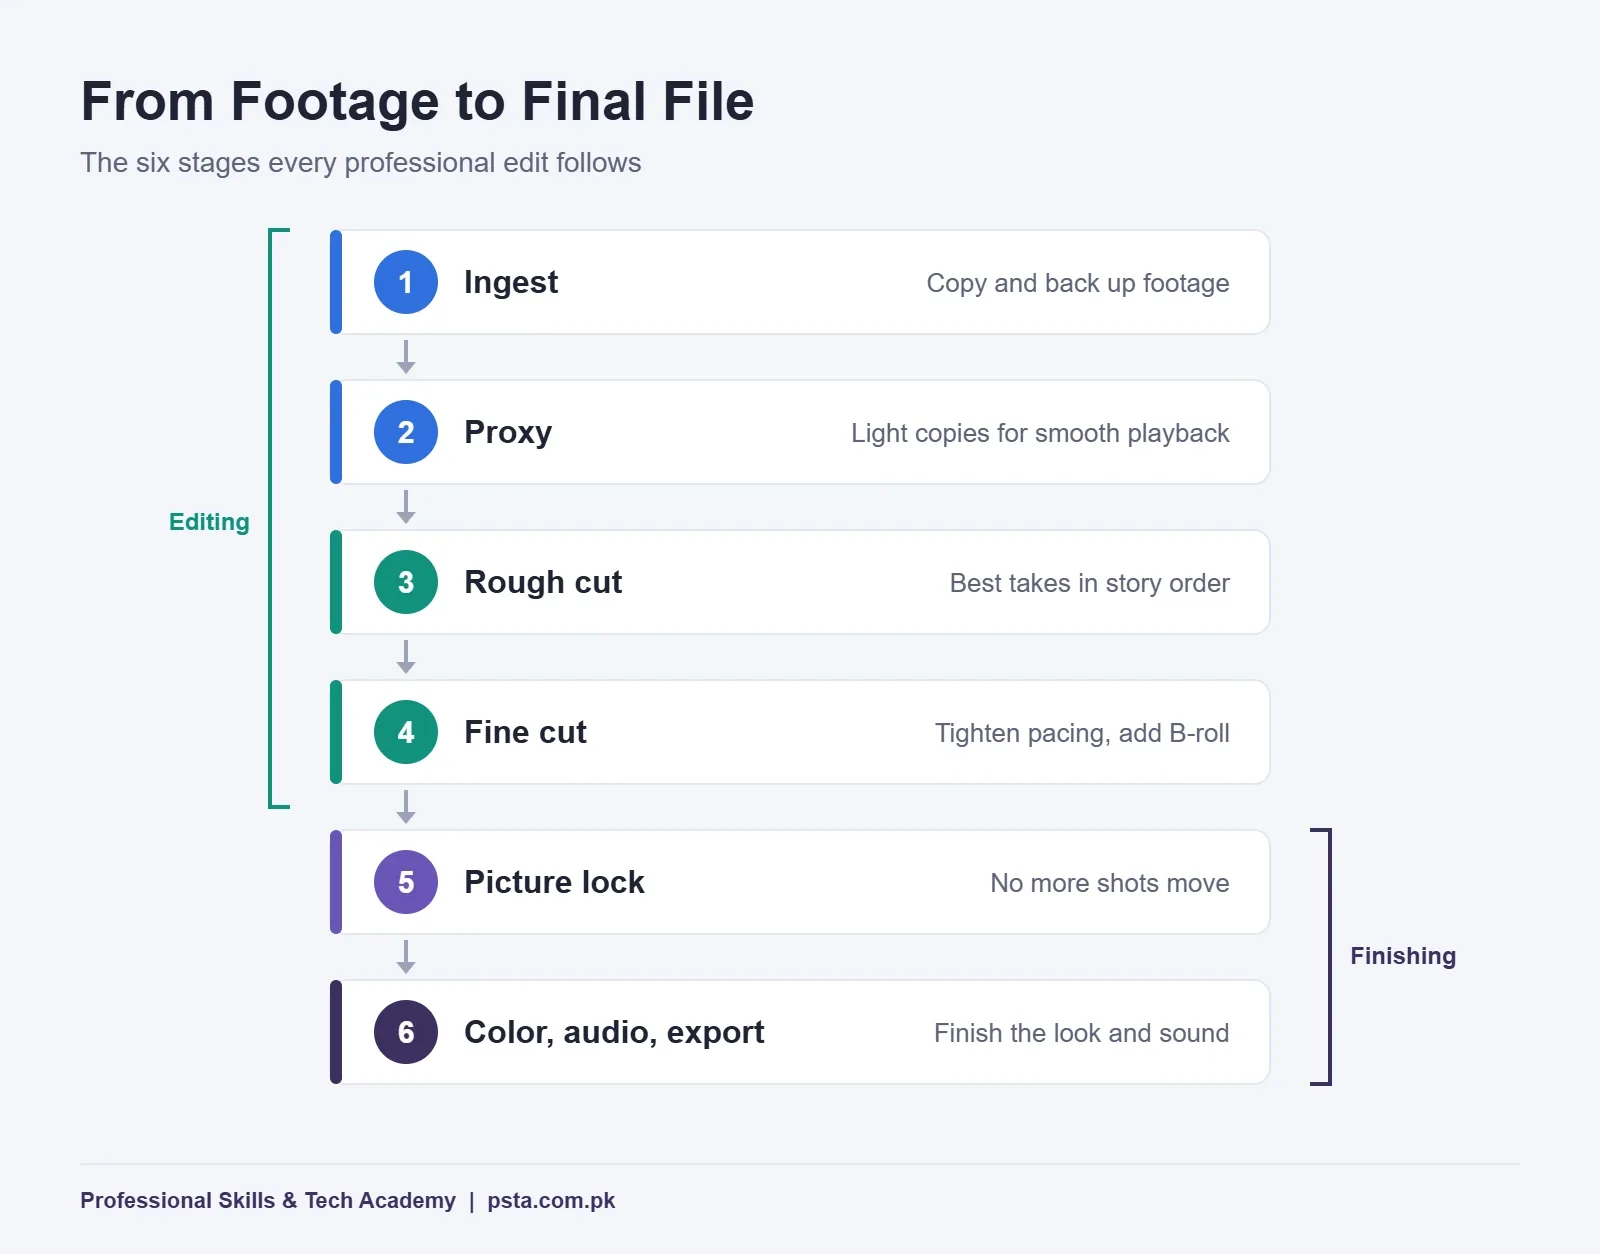
- Ingest: copy footage from the camera card or phone into an organized project folder, with a backup.
- Proxy: create lightweight copies of heavy files, such as 4K footage, so an average laptop can play them smoothly. You switch back to the originals for export.
- Rough cut: place the best takes in story order. It's long and messy, and that's fine.
- Fine cut: tighten timing, fix pacing and add B-roll.
- Picture lock: the point where no more shots move. Color and final sound happen after this.
- Color, audio mix and export: finish the look and sound, then render the final file.
DaVinci Resolve even builds this order into its layout. Its workspace is split into Media, Cut, Edit, Fusion, Color, Fairlight and Deliver pages, as shown on the DaVinci Resolve product page, and version 21 adds a Photo page for stills.
Frame and Format Terms That Decide How Your Video Looks
Frame Rate
Frame rate is how many still images play each second, written as fps. Common rates are 24, 25, 30, 50 and 60. YouTube's guidance is simple: upload at the same frame rate you recorded. Mixing a 25 fps phone clip with 30 fps camera footage can cause small stutters, so pick one project rate early.
Resolution
Resolution is the pixel size of each frame. 1080p means 1920 by 1080 pixels. 4K, also called UHD, means 3840 by 2160. Higher resolution gives you room to crop, but it needs more storage and a faster computer.
Aspect Ratio
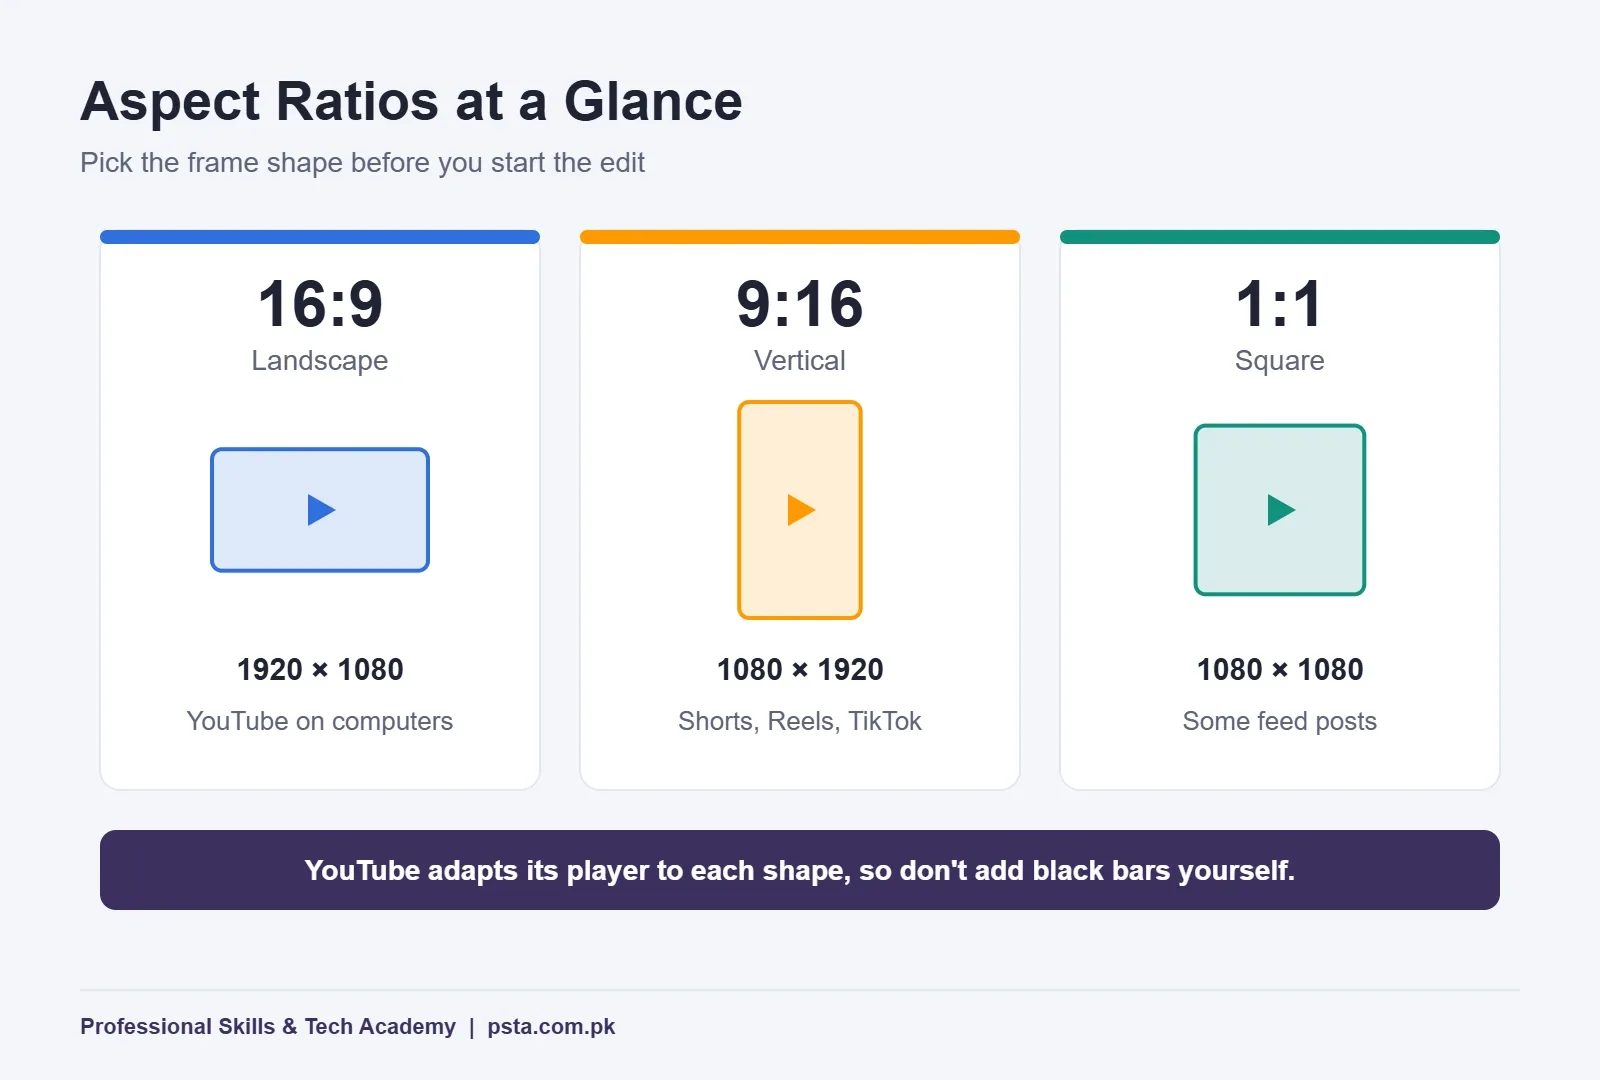
Aspect ratio is the shape of the frame, written as width to height. YouTube's aspect ratio help page calls 16:9 the standard on a computer. It also asks creators not to add their own black bars, because the player adjusts to each video's shape. Vertical 9:16 is the format for Shorts, Reels and TikTok. Square 1:1 still appears in some feed posts. YouTube says its Shorts tools now support videos up to 3 minutes long.
A safe zone is the area of the frame where text won't be hidden. On vertical videos, the app's buttons and captions cover the bottom and right edges, so keep titles near the center.
Color Terms: Correction Comes Before Grading
Beginners often use these two words as if they mean the same thing. They don't, and clients notice the difference.
- Color correction fixes problems. You balance exposure, fix white balance and make shots from different cameras match.
- Color grading creates a mood. A warm, golden look for a mehndi film or a cool, clean look for a tech review is grading.
- White balance makes white objects look white. Footage shot under tube lights often turns green or blue without it.
- LUT (lookup table) is a saved color recipe you apply in one click. It's a starting point, not a finished grade.
- Log footage is recorded flat and gray on purpose, to keep detail in highlights and shadows. It always needs correction.
Audio Terms Every Editor Uses Daily
Viewers forgive average picture quality much faster than bad sound. These are the audio words you'll use on almost every project.
- Audio levels: loudness measured in decibels (dB). Dialogue should be clear and consistent from start to finish.
- Clipping: distortion when a sound is too loud for the recording. You usually can't repair it fully, so record carefully.
- Room tone: 20 to 30 seconds of silence recorded on set. You use it to fill gaps so cuts don't sound dead.
- Audio ducking: lowering music automatically while someone speaks.
- Noise reduction: removing hum, fan noise or traffic sound. Push it too far and voices sound robotic.
- Syncing: lining up audio from a separate mic with the camera's video, usually by matching the waveform of a clap.
Effects Terms: Keyframes, Keying and Compositing
These are the terms that show up once you move past simple cuts.
- Keyframe: a saved value at a point in time. Set two keyframes for position and the software animates between them.
- Speed ramp: a smooth change in playback speed inside one clip, popular in sports and car videos.
- Chroma key: removing a green or blue background so you can place the subject on a new one. This is the green screen effect.
- Compositing: combining several layers of video, images and effects into one shot.
- Motion graphics: animated text, shapes and icons, such as lower-third name titles or animated logos.
- Masking: limiting an effect to one part of the frame, like blurring a number plate.
How Do Export Settings Work?
Export, also called rendering, turns your timeline into one playable file. Four words control most of the result.
- Container: the file type that holds video and audio together, such as MP4 or MOV.
- Codec: the method used to compress the video. H.264 is the most common choice for web delivery.
- Bitrate: how much data each second of video uses, in megabits per second (Mbps). Too low looks blocky. Too high wastes upload time.
- Sample rate: how many times per second the audio is measured. 48 kHz is the video standard.
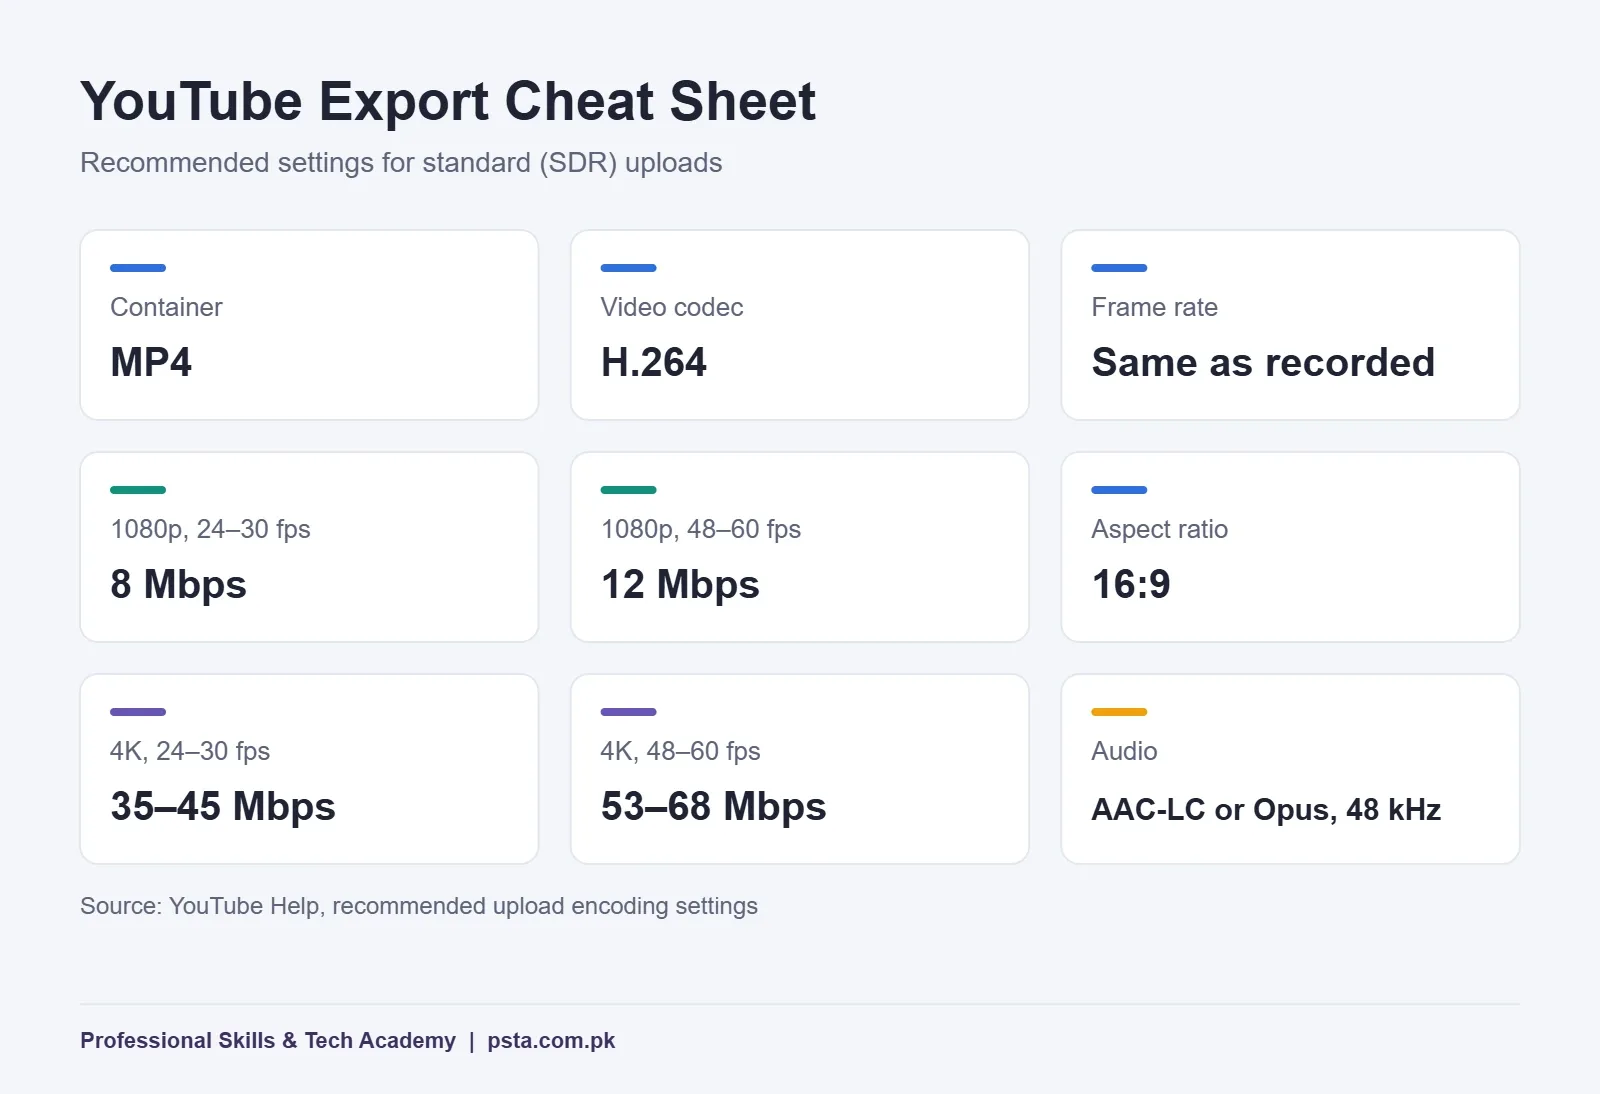
The table below shows the settings YouTube recommends in its upload encoding guide for standard (SDR) uploads.
| Setting | YouTube's Recommendation |
|---|---|
| Container | MP4 |
| Video codec | H.264, progressive scan |
| Frame rate | Same as recorded (24, 25, 30, 48, 50 or 60 fps) |
| 1080p bitrate, 24 to 30 fps | 8 Mbps |
| 1080p bitrate, 48 to 60 fps | 12 Mbps |
| 4K bitrate, 24 to 30 fps | 35 to 45 Mbps |
| 4K bitrate, 48 to 60 fps | 53 to 68 Mbps |
| Audio | AAC-LC or Opus, 48 kHz |
| Aspect ratio | 16:9 standard on computers |
These are the YouTube export settings most beginners need. Save them as a preset once, and you'll export every YouTube video the same way. That removes one common source of mistakes.
Do Premiere Pro and DaVinci Resolve Use the Same Words?
Mostly, yes. Most video editing terms are shared, but a few names differ, and they confuse students who follow tutorials for both apps. Here's a quick translation.
| Idea | Adobe Premiere Pro | DaVinci Resolve |
|---|---|---|
| Where clips are stored | Project panel and bins | Media Pool and bins |
| The edit you build | Sequence | Timeline |
| Color work | Lumetri Color panel | Color page |
| Audio mixing | Audio Track Mixer | Fairlight page |
| Making the final file | Export | Deliver page |
| Price | $22.99 a month on an annual plan, billed monthly (US price) | Free version; Studio costs $295 |
Prices are from the Adobe Premiere plans page and Blackmagic Design's product page, checked in October 2026. The free Resolve version handles footage up to Ultra HD at 60 fps, which covers most beginner and freelance work. That's why I suggest beginners on a tight budget start there. If you're also choosing design apps, our guide to graphic design software for beginners compares those options.
Where These Skills Lead in Pakistan
The audience is already large. DataReportal's Digital 2026 Pakistan report puts YouTube's ad reach at 54.3 million users in late 2025. It also counts 79.9 million TikTok users aged 18 and above. Every shop, school and clinic that wants those viewers needs edited video.
Freelance demand is strong too. In Upwork's In-Demand Skills 2026 release, video editing ranked second among Design and Creative skills. AI video generation and editing grew 329%. Clients still hire people who understand pacing, sound and story, and they expect you to know the video editing terms in their brief.
Typical starting roles include short-form editor for local brands, YouTube editor for creators and freelance editor on Upwork or Fiverr. If freelancing is your plan, read our walkthrough of Upwork for beginners in Pakistan. Results depend on your portfolio and practice, so treat the first three months as skill-building time.
Learn Video Editing With PSTA
If you'd like structured video editing for beginners with an instructor checking your work, our Mastering Video Editing & Visual Effects (VFX) course runs for 12 weeks and starts from zero, so no editing experience is needed. Classes run on campus in Abbottabad and online for students anywhere in Pakistan. The current fee is Rs. 22,000, down from Rs. 25,000.
The 10 modules cover every group of video editing terms in this guide:
- Editing workspaces and tools
- Storytelling, timeline management and rough cuts
- Cinematic editing techniques and transitions
- Color correction and color grading
- Sound design, audio mixing and background score
- Green screen (chroma keying) and compositing
- Visual effects and motion graphics
- Formatting and exporting for YouTube and social media
- Freelancing strategies, client acquisition and portfolio building
- Final capstone project and certification
Many students pair it with our Social Media Marketing and Meta Ads course, since brands often want one person who can edit a reel and promote it. Designers can add the Graphic Designing course for thumbnails and titles. You can compare everything on the all courses page.
Practice Task: Label a 60-Second Edit
Open any free editor and cut a 60-second video from your phone footage. Then label it with the video editing terms above. Mark one J-cut, one L-cut, one cutaway and one keyframe. Export it at the YouTube settings in the table and check the file size. If you can explain each choice out loud, you know the basics better than many people who've edited for months.
Want guided feedback on your edits? Apply through the PSTA admission page, or send your questions on WhatsApp (+92 314 5424399). Our campus is on Old College Road, Mandian, opposite FIMS College, Abbottabad.
Frequently asked questions
What is the difference between a J-cut and an L-cut?
In a J-cut, you hear the next shot's audio before its picture appears. In an L-cut, the picture changes first while the previous shot's audio keeps playing. Both make dialogue feel natural, which is why interviews, documentaries and podcasts use them on almost every speaker change.
Is DaVinci Resolve free to use?
Yes. Blackmagic Design offers a free version of DaVinci Resolve that handles 8-bit footage up to Ultra HD (3840 x 2160) at 60 fps. The paid Studio version costs $295 and adds 10-bit support, higher frame rates and extra AI tools. Most beginners can learn and freelance on the free version.
What bitrate should I use to export 1080p video for YouTube?
YouTube's upload encoding guide recommends 8 Mbps for 1080p at 24 to 30 fps and 12 Mbps at 48 to 60 fps. Use an MP4 container, the H.264 codec and AAC-LC or Opus audio at 48 kHz. Keep the frame rate you recorded rather than converting it.
What does picture lock mean in video editing?
Picture lock is the point where the edit's shots and timing are final. After it, the editor or a colorist grades the footage and the sound is mixed. Agreeing on picture lock with a client protects you from endless changes, because color and audio work depend on fixed timing.
Do I need a powerful laptop to start video editing?
Not always. A mid-range laptop can handle 1080p projects, and proxies help with heavier 4K footage. A proxy is a lightweight copy you edit with, then the software switches back to the original files for export. More RAM and an SSD make the biggest everyday difference.
What is the difference between color correction and color grading?
Color correction fixes technical problems such as wrong white balance, dark exposure or cameras that don't match. Color grading comes after and gives the video a style, such as warm and golden or cool and clean. Correct first, then grade, or the look will be inconsistent.
How long does it take to learn video editing basics?
You can learn the core terms and simple cuts in a few weeks of regular practice. Getting comfortable with color, sound and client-ready exports usually takes a few months. PSTA's Video Editing and VFX course covers this in 12 weeks, ending with a capstone project.
Sources & references
- YouTube Help: Recommended upload encoding settings support.google.com
- YouTube Help: Aspect ratios support.google.com
- YouTube Help: Get started creating YouTube Shorts support.google.com
- Blackmagic Design: DaVinci Resolve blackmagicdesign.com
- Adobe: Premiere Pro plans and pricing adobe.com
- DataReportal: Digital 2026 Pakistan datareportal.com
- Upwork: In-Demand Skills 2026 upwork.com
Last reviewed & updated on by Umar Qureshi. Written by the PSTA team in Abbottabad, Pakistan.

Umar Qureshi

Mastering Video Editing & Visual Effects (VFX)
Turn this guide into a career: hands-on training with real projects, online across Pakistan or on-campus in Abbottabad · 12 Weeks.


Comments
No comments yet — ask a question or share your experience.