Quick answer
Create named layers in AutoCAD before you draw, keep every object ByLayer, and avoid drawing on layer 0 or Defpoints. Use Off for quick hiding, Freeze for long-term hiding, Lock to protect objects, and Plot off for notes. Save layer states for each sheet, then store the setup as a DWT template.
Key takeaways
- • Layer 0 behaves differently inside blocks and Defpoints never plots, so keep your work on named layers.
- • Set color, linetype and lineweight on the layer and leave objects ByLayer.
- • Freeze hides a layer from display, plotting and regeneration; Off only hides and stops plotting.
- • LAYISO, LAYWALK, LAYMRG and LAYERP make daily layer work much faster.
- • Save the finished setup, including DIMLAYER and HPLAYER, as a DWT template.
Table of contents 15 sections
- What Are Layers in AutoCAD, Really?
- Why Does Everything Go Wrong on Layer 0?
- Step 1: Plan Your Layer List Before You Draw
- Step 2: How Should You Name AutoCAD Layers?
- Step 3: Create Layers in the Layer Properties Manager
- Step 4: Give Each Layer Color, Linetype and Lineweight
- Off, Freeze, Lock or No-Plot: Which Switch Do You Need?
- Step 5: Use ByLayer in AutoCAD and Route Hatches and Dimensions Automatically
- Step 6: Learn the Quick Layer Commands
- Step 7: Save Views With Layer States
- How Do You Clean Up a Messy Layer List?
- Step 8: Save Everything as an AutoCAD Layer Template
- Common Layer Mistakes Instructors See
- Practice Layer Management in PSTA's AutoCAD Course
- Try This on Your Next Drawing
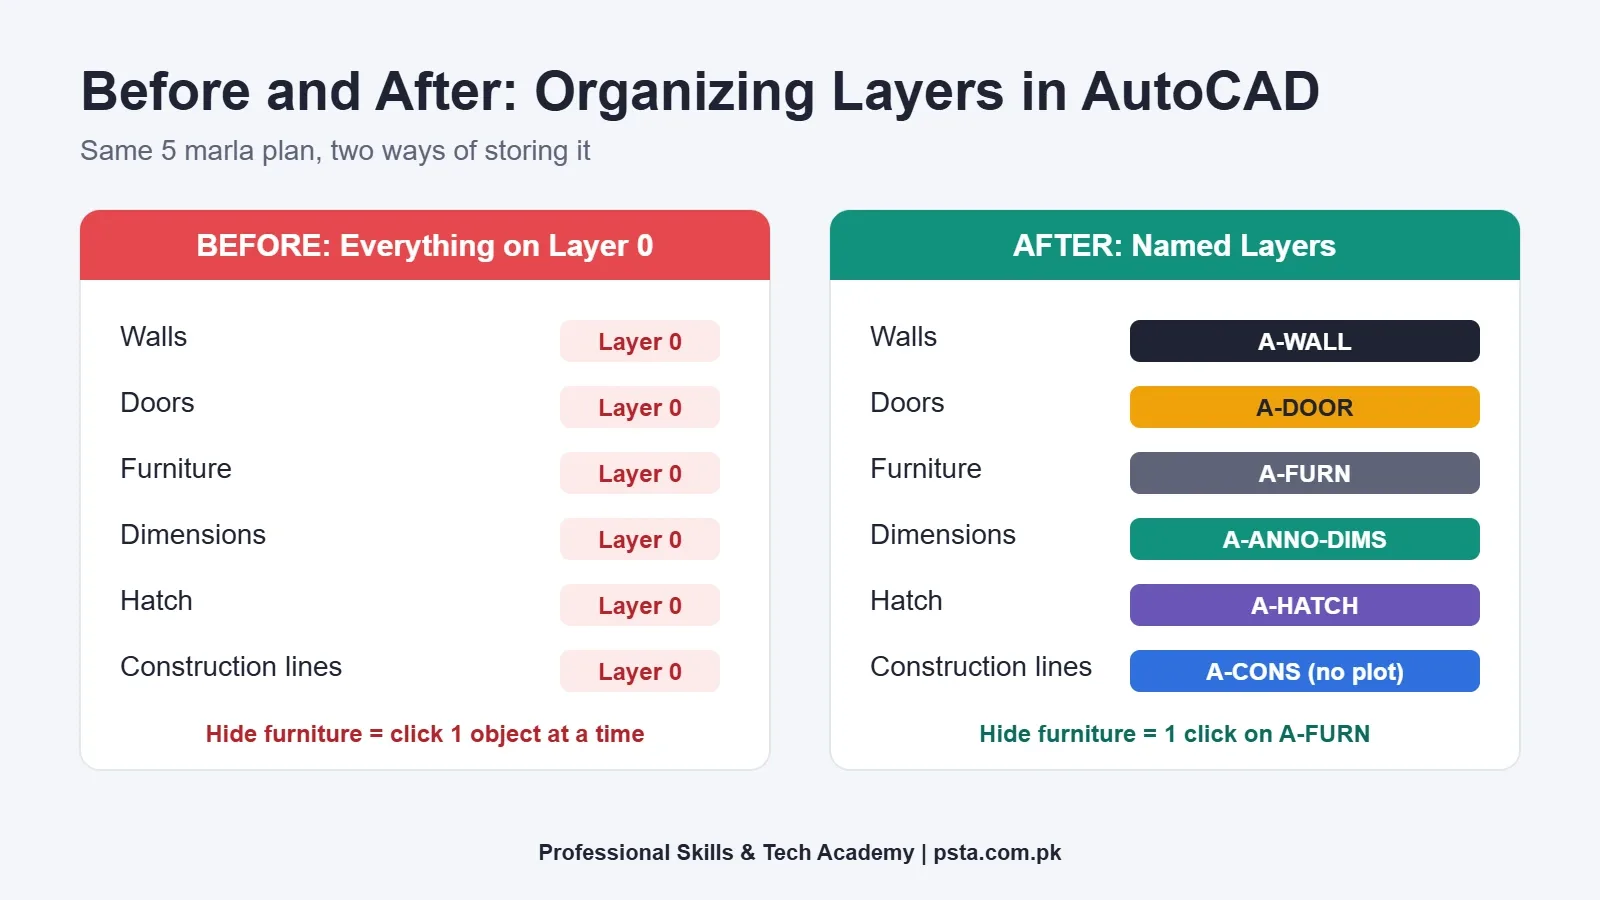
Example scenario: a civil engineering student in Abbottabad finishes a 5 marla ground floor plan for a client. Walls, doors, furniture, dimensions and hatch all sit on one layer called 0. The client asks for a copy without furniture, and the student spends an hour clicking objects one by one. Setting up layers in AutoCAD before the first line would have turned that hour into two clicks.
This guide walks you through a clean system for layers in AutoCAD, step by step, using the tools Autodesk documents in its own help pages. By the end, you will be able to:
- Explain what a layer controls and why ByLayer matters
- Name layers so any office can read your drawing
- Pick the right switch: off, freeze, lock or no-plot
- Use quick commands like LAYISO, LAYWALK and LAYMRG
- Save the whole setup as a template you reuse on every job
What Are Layers in AutoCAD, Really?
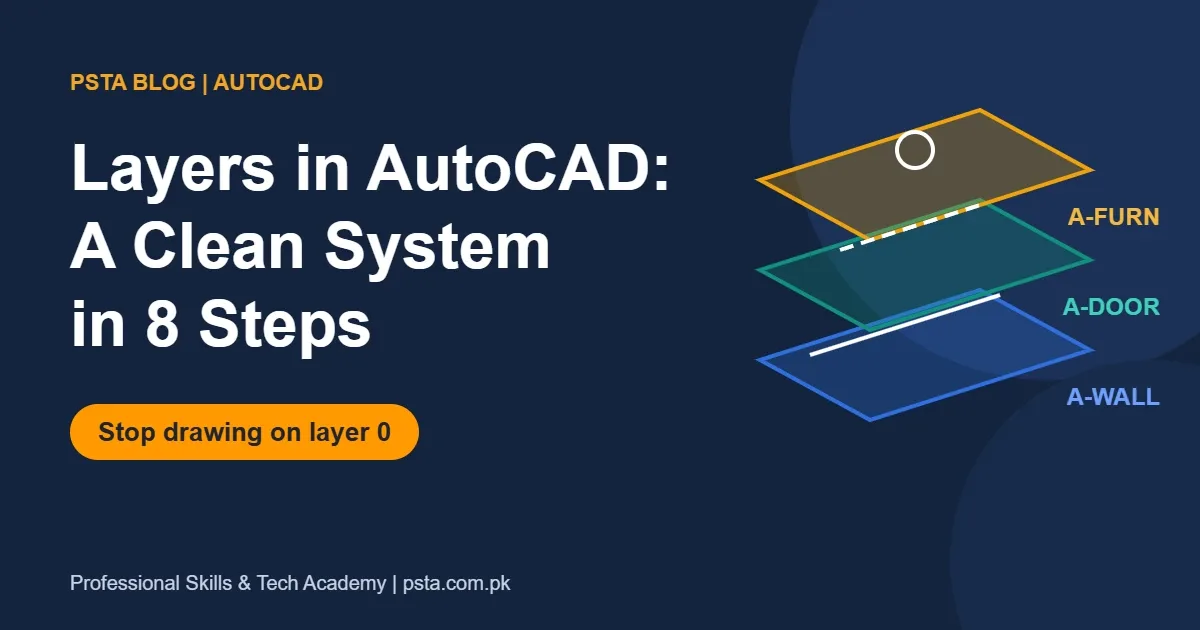
A layer is a named group that controls how a set of objects looks, prints and behaves. Autodesk describes layers as the primary way to organize drawing objects by function or purpose. Think of clear plastic sheets stacked on a table. Walls go on one sheet, doors on another and dimensions on a third.
Each layer carries its own color, linetype, lineweight, transparency and plot setting. When an object's properties are set to ByLayer, it simply takes those values from its layer. Change the layer color once, and every wall in the plan changes with it.
That single idea is why drafting offices care so much about layers in AutoCAD. A tidy layer list lets someone else open your file, hide what they don't need and print a clean sheet without asking you a single question.
Why Does Everything Go Wrong on Layer 0?
Every new drawing starts with a layer named 0, and beginners keep drawing on it. Autodesk's own onboarding guide advises against this. Layer 0 has special behavior inside blocks, so objects drawn there can change appearance when you insert them somewhere else. Create layers in AutoCAD with meaningful names instead and leave 0 for block geometry.
A second trap appears as soon as you add a dimension. AutoCAD creates a reserved layer called Defpoints. Objects on Defpoints do not plot, and Autodesk recommends that you never place your own work there. If a line shows on screen but vanishes from your PDF, check whether it slipped onto Defpoints.
The third trap is overriding properties object by object. If you color a few walls red directly, they stop following their layer. Later, when you change the wall layer to gray, those red walls stay red. Set properties back to ByLayer and the drawing behaves predictably again.
Step 1: Plan Your Layer List Before You Draw
Spend five minutes listing what the drawing will contain. Autodesk's guidance is to set up your layers at the start and save them in a template. For a small house plan, a starting list might look like this:
- Walls, columns and structure
- Doors and windows
- Furniture and fixtures
- Dimensions and text
- Hatch and fills
- Grid lines and construction lines that should not print
- Title block and layout viewports
Notice the last two. Autodesk suggests separate layers for construction and reference geometry you don't plot, and another for layout viewports. That way the rectangle around each viewport never shows up on the printed sheet.
Step 2: How Should You Name AutoCAD Layers?
Good AutoCAD layer naming means a pattern that a stranger can read. For small personal projects, Autodesk suggests starting names with a two-digit number, such as 01-WALL and 02-DOOR, so they stay in a fixed order. For professional work, many firms follow the AIA layer format used in the US National CAD Standard.
That format joins short fields with hyphens. A guide on the AIA CAD layer format explains the parts:
| Field | Length | Example | Meaning |
|---|---|---|---|
| Discipline designator | 2 characters, required | A- | Who drew it (A = architectural) |
| Major group | 4 characters, required | WALL | The building system |
| Minor group | 4 characters, optional | SWNG | A narrower part, such as door swings |
| Status | 1 character, optional | N, E, D | New, existing, or to demolish |
So A-WALL holds architectural walls, A-DOOR-SWNG holds door swing arcs, and E-LITE holds electrical lighting. If an office in Lahore or Karachi hands you its own template, follow theirs exactly. Consistency inside one office matters more than which system you pick.
Step 3: Create Layers in the Layer Properties Manager
Type LAYER and press Enter, or click Layer Properties on the Home tab. The AutoCAD Layer Properties Manager opens as a palette.
- Click the New Layer button. A row appears with a default name.
- Type the name, for example A-WALL, and press Enter.
- Repeat for each layer on your list.
- Press F2 on any row later if you need to rename it.
- Add a short note in the Description column for anything unusual.
Double-click a layer to make it current. A green check mark shows the current layer, and every new object you draw lands there. A frozen layer cannot be current, so thaw it first if AutoCAD refuses.
Step 4: Give Each Layer Color, Linetype and Lineweight
Click the color swatch in a layer's row to set its color. Click the linetype name to load and assign dashed or center lines. Click the lineweight to set how thick it prints. Transparency runs from 0 to 90, with higher numbers more see-through, which is handy for background grids.
A practical scheme for a house plan:
| Layer | Color | Linetype | Plot? |
|---|---|---|---|
| A-WALL | White/black | Continuous | Yes |
| A-DOOR | Yellow | Continuous | Yes |
| A-FURN | Gray | Continuous | Yes |
| A-ANNO-DIMS | Green | Continuous | Yes |
| A-GRID | Red | Center | Yes |
| A-CONS | Cyan | Dashed | No |
Autodesk also advises keeping lineweight display off while you draw, since thick lines can hide snap points. Turn it on to check the drawing before you plot. For dashed lines that look solid, adjust LTSCALE.
Off, Freeze, Lock or No-Plot: Which Switch Do You Need?
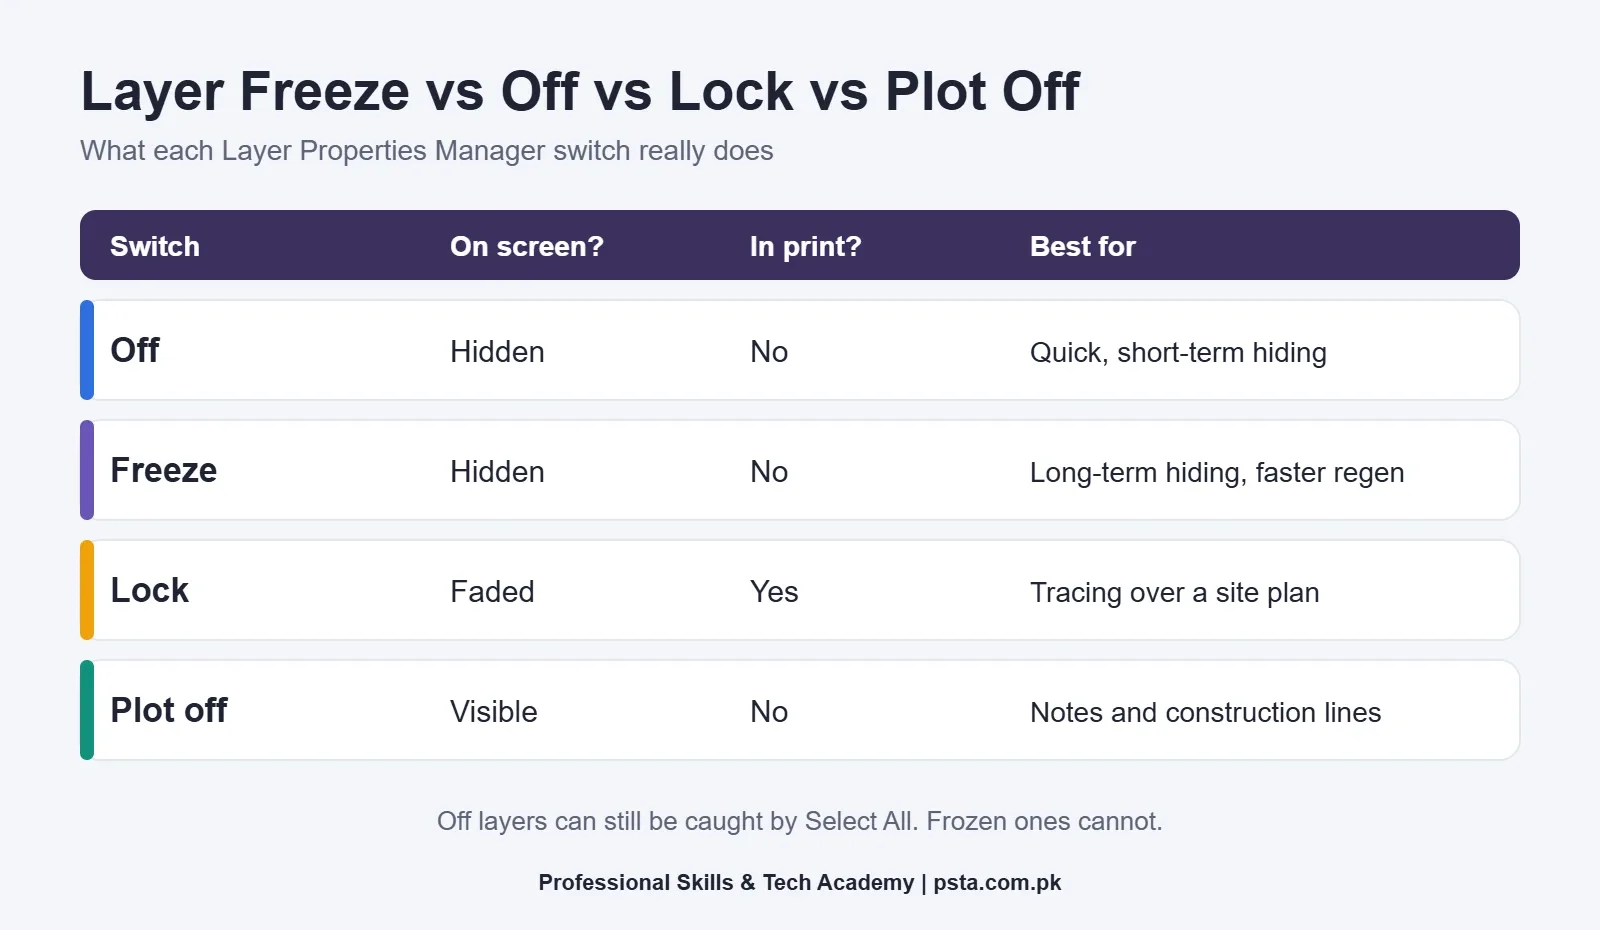
The layer freeze vs off question confuses most beginners. These four switches look similar but do different jobs. Choosing the right one for your layers in AutoCAD saves time and avoids printing mistakes.
- Off hides objects and stops them from plotting. Autodesk notes they can still be picked up when you select All, so an erase of everything can catch them.
- Freeze hides objects and removes them from display, plotting and regeneration. Use it for layers that stay hidden for long periods. It can also speed up very large drawings.
- Lock keeps objects visible but protects them from edits. Locked objects appear faded by default, which is ideal for a site plan you trace over.
- Plot off keeps objects on screen but leaves them out of the print. Use it for notes to yourself and construction lines.
In layout tabs you get two more options. VP Freeze hides a layer only in the current viewport, and New VP Freeze hides it in viewports you create later. That is how one sheet shows furniture and another, from the same model, shows only the structure.
Step 5: Use ByLayer in AutoCAD and Route Hatches and Dimensions Automatically
Keep the Properties panel set to ByLayer for color, linetype and lineweight. When you need to fix a stray object, select it and set its properties back to ByLayer in the Properties palette. Match Properties copies a layer and its settings from one object to another.
AutoCAD can also send certain objects to the right layer for you. The About Layers help page mentions the DIMLAYER system variable for dimensions and HPLAYER for hatches. Set them to your dimension and hatch layers, and you no longer need to switch the current layer every time you annotate.
Step 6: Learn the Quick Layer Commands
The Layer Properties Manager is the control room for layers in AutoCAD, but daily work runs faster from the command line. Autodesk's commands for layers list includes these favorites:
| Command | What It Does | When You'd Use It |
|---|---|---|
| LAYISO | Hides or locks all layers except those of the objects you pick | Editing walls without touching furniture |
| LAYUNISO | Restores layers changed by LAYISO | Going back to the full view |
| LAYOFF | Turns off the layer of a picked object | Clearing clutter fast |
| LAYFRZ | Freezes the layer of a picked object | Hiding a layer for a long session |
| LAYMCUR | Makes a picked object's layer current | Drawing more of the same thing |
| LAYMCH | Moves picked objects to a matching layer | Fixing objects on the wrong layer |
| LAYERP | Undoes the last layer setting changes | Recovering after too many clicks |
| LAYON / LAYTHW | Turns on or thaws all layers | Checking nothing is hidden |
The LAYISO command deserves practice first. You click one wall, press Enter, and everything else fades or hides. Edit what you need, then type LAYUNISO to bring the rest back.
Step 7: Save Views With Layer States
Layer states are the most underused feature of layers in AutoCAD. A layer state is a saved snapshot of which layers are on, frozen, locked and how they look. Open the Layer States Manager from the Layer Properties Manager, or type LAYERSTATE. Save one state called "Client - no furniture" and another called "Full plan."
Next time the client asks for the furniture-free version, you restore that state instead of clicking layers one by one. Autodesk notes that only the settings you included when saving are restored, so check the options before you save.
For large drawings, layer filters keep the list manageable. A property filter can show only layers that are on and thawed. A group filter shows only the layers you drag into it. The search box at the top also accepts wildcards, so typing A-* lists every architectural layer.
How Do You Clean Up a Messy Layer List?
Drawings you receive from others often arrive with dozens of odd layers in AutoCAD format that nobody explained. Autodesk's cleaning up layers tip sheet points to four tools:
- LAYWALK shows the objects on one layer at a time so you can see what each layer actually holds.
- LAYMRG moves objects from the layers you choose onto a target layer and then removes the old layers.
- LAYDEL erases every object on a layer and purges the layer. Use it with care, and save a copy first.
- PURGE removes layers and other named items that nothing uses.
The same page notes that if your layer list stops sorting alphabetically, the drawing may have more layers than the MAXSORT limit, which defaults to 1000. That is rare in student work but common in large consultancy files.
Step 8: Save Everything as an AutoCAD Layer Template
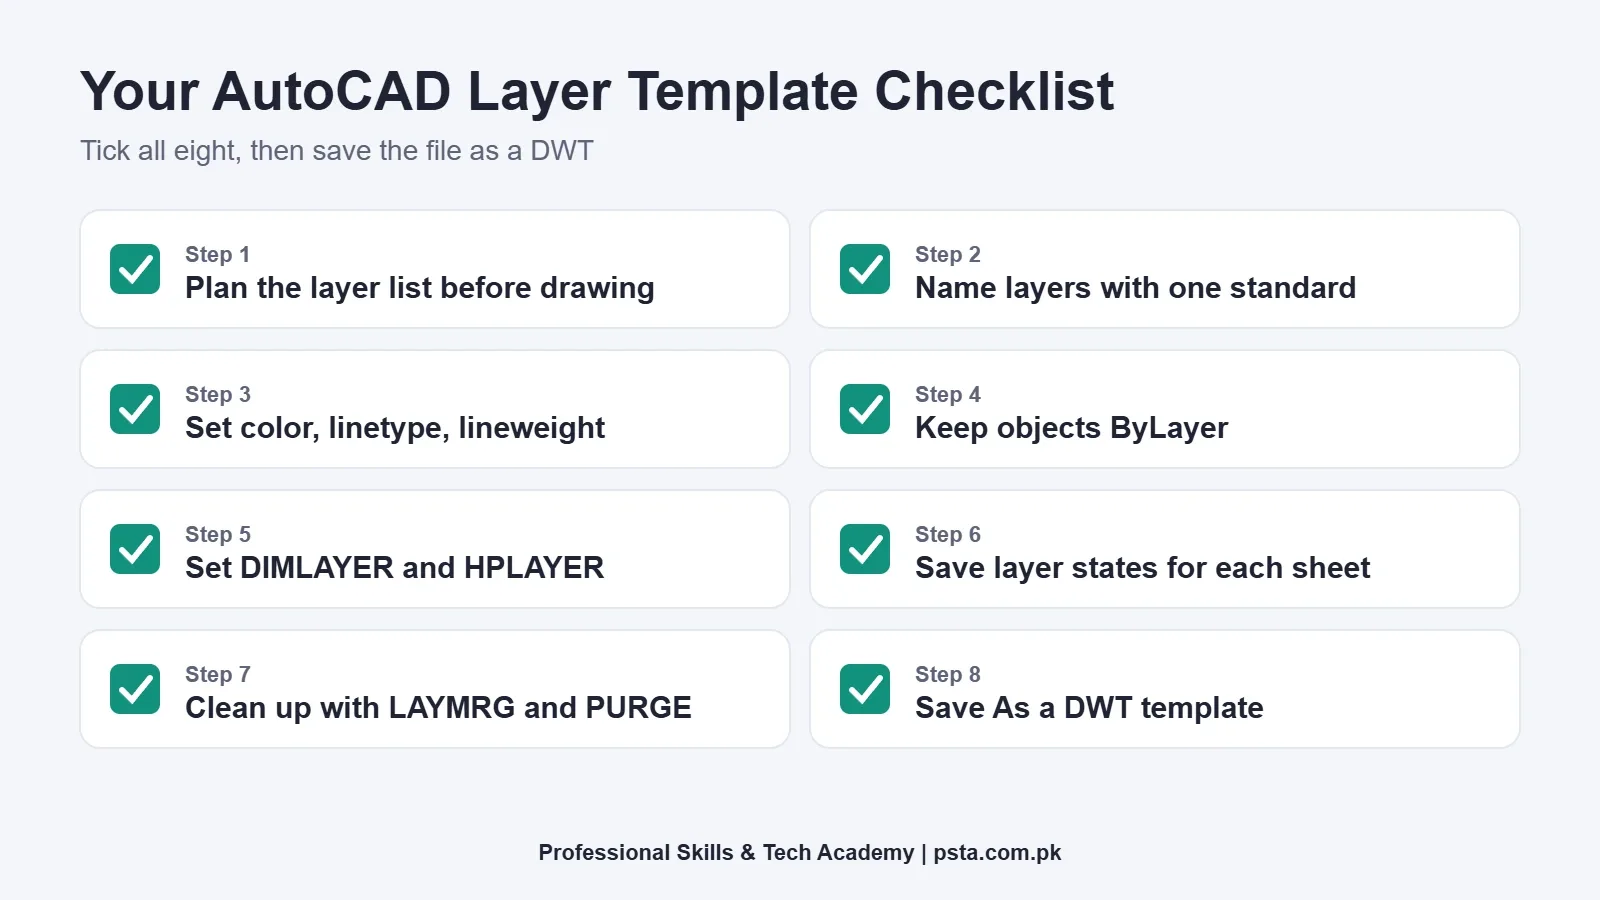
Once your layers, colors, linetypes, DIMLAYER and HPLAYER settings are right, delete the drawing objects and use Save As with the DWT file type. Start every new house plan from that template. You will never rebuild the list again, and every drawing you hand over will look the same.
If you already practice with the 5 marla house plan in AutoCAD walkthrough, redo it with your template. Then follow the guide on plotting AutoCAD drawings to scale and print the furniture and no-furniture versions from two layer states. Our list of AutoCAD shortcut keys pairs well with the layer commands above.
Common Layer Mistakes Instructors See
- Drawing everything on 0, then sorting it out at the end
- Coloring objects directly instead of keeping them ByLayer
- Leaving the viewport rectangle on a plotting layer
- Using Off when Freeze would keep a big drawing faster
- Deleting a layer with LAYDEL without checking what was on it
- Inventing new names on every project instead of using one template
Each of these mistakes with layers in AutoCAD is easy to fix in five minutes. Each one also tells an employer, within seconds of opening your file, how carefully you work.
Practice Layer Management in PSTA's AutoCAD Course
Managing layers in AutoCAD is a full module in the AutoCAD Mastery: 2D, 3D Design & BIM course at PSTA (Professional Skills & Tech Academy). Module 3 covers layers, dimensions and text annotation, and later modules move to blocks, X-refs, 3D modeling, rendering and plotting to scale. On the course page it is marked beginner level, runs between 45 and 90 days and costs Rs. 28,000.
You can study on campus in Abbottabad, through live online classes from any city, or in hybrid mode. New batches start every month. Browse the full list on the courses page, see how certificates are checked on the certificate verification page, or apply through admission. If you're still deciding, the guide on learning AutoCAD in Pakistan covers the wider picture.
Try This on Your Next Drawing
Open the last drawing you made and type LAYWALK to audit its layers in AutoCAD. Count how many layers hold real work and how many objects sit on 0. Then build the eight-layer list from Step 1, move objects with LAYMCH, and save the result as your first template. Questions along the way are welcome on WhatsApp at +92 314 5424399.
Frequently asked questions
What is the difference between freezing and turning off a layer in AutoCAD?
Both hide objects and keep them out of the print. Turning a layer off is quick and temporary, and its objects can still be caught by Select All. Freezing also removes the layer from regeneration, so frozen objects cannot be selected and very large drawings can respond faster. Use Off for a few minutes of clutter and Freeze for layers you will not need for a while.
Why should I not draw on layer 0 in AutoCAD?
Layer 0 has special behavior inside blocks. Objects drawn on it can take on the properties of the layer where the block is inserted, so they may suddenly change color or linetype. Autodesk advises creating layers with meaningful names for your work and keeping layer 0 for block geometry that is meant to adapt.
What is the Defpoints layer and why does my line not print?
AutoCAD creates Defpoints automatically when you add a dimension. It stores the points dimensions measure from, and anything on it does not plot. If a line appears on screen but disappears from your PDF or plotter output, select it and check the Properties palette. Move it to a proper layer and it will print normally.
How many layers should a simple house plan have?
There is no fixed number, but a 5 marla or 10 marla floor plan usually works well with about 8 to 12 layers. Typical groups are walls, doors and windows, furniture, dimensions, text, hatch, grid, construction lines and viewports. Add more only when you genuinely need to hide or print something separately.
Can I copy layers from one drawing to another?
Yes. The simplest way is to start new drawings from a DWT template that already contains your layers. You can also open DesignCenter, browse to another drawing and drag its layers into the current one. Copying an object between drawings also brings its layer along, though that can add clutter you later need to purge.
What does ByLayer mean in AutoCAD?
ByLayer means an object takes its color, linetype, lineweight or transparency from the layer it sits on. If you change the layer color, every ByLayer object on it updates at once. When an object shows a fixed value such as red instead, it ignores its layer, which is why instructors ask you to keep almost everything ByLayer.
Do AutoCAD layer names have to follow the AIA standard?
No. AIA and National CAD Standard names such as A-WALL are common in professional offices, but smaller teams often use numbered names like 01-WALL. What matters is that everyone in the office uses the same scheme. If your employer or client gives you a template, follow its names exactly rather than inventing your own.
Sources & references
- About Layers (AutoCAD LT 2026 Help) help.autodesk.com
- Layer Properties Manager (AutoCAD LT 2026 Help) help.autodesk.com
- Change Object Properties and Organize Objects with Layers (Autodesk) help.autodesk.com
- Commands for Layers (AutoCAD LT 2025 Help) help.autodesk.com
- Cleaning Up Layers (Autodesk Did You Know) help.autodesk.com
- The AIA CAD Layer Format blog.draftsperson.net
Last reviewed & updated on by Umar Qureshi. Written by the PSTA team in Abbottabad, Pakistan.

Umar Qureshi

AutoCAD Mastery: 2D, 3D Design & BIM (Complete Professional Course)
Turn this guide into a career: hands-on training with real projects, online across Pakistan or on-campus in Abbottabad · 45 - 90 Days.

Comments
No comments yet — ask a question or share your experience.