Quick answer
To use the pen tool in Illustrator, press P, click for corners and drag for curves. Hold Alt to split handles at a corner, Shift for 45-degree lines, and Ctrl-click away to end an open path. Fix points with Direct Selection (A), then clean up with Object > Path > Simplify and check in Outline view.
Key takeaways
- • Click to place corner points and drag to pull out handles for curves.
- • Hold Alt to split handles at a corner, and Ctrl-click away to end an open path.
- • Keep direction handles short and use the fewest anchors that match the shape.
- • The Curvature tool suits soft shapes, Image Trace suits busy artwork, and the pen tool suits logos and lettering.
- • Finish every logo with Simplify, Join and a check in Outline view (Ctrl + Y).
Table of contents 14 sections
- What Does the Pen Tool in Illustrator Actually Draw?
- Pen Tool in Illustrator: The Keys You'll Press Most
- Step 1: Set Up a Practice File Before You Draw
- Steps 2 and 3: Draw Straight Lines, Then Close the Path
- Step 4: How Do You Draw a Smooth Curve?
- Steps 5 and 6: Corners Between Curves and Straight Exits
- Step 5: Turn a Corner Between Two Curves
- Step 6: Go From a Curve to a Straight Line
- Step 7: Edit Anchors Without Starting Over
- Step 8: Simplify, Join and Check in Outline View
- Pen, Curvature or Image Trace: Which Should You Use?
- Mistakes That Make Pen Paths Look Amateur
- Practicing the Pen Tool in PSTA's Graphic Designing Course
- Today's Exercise: Redraw One Shop Sign
Example scenario: a sweet shop owner in Abbottabad sends a designer a blurry WhatsApp photo of the logo printed on his mithai box. He wants it on a 10-foot flex banner by Friday. Auto-tracing the photo gives lumpy edges and dozens of stray points, so the designer redraws the logo by hand with the pen tool in Illustrator, and the banner prints with crisp edges at any size.
That redraw is a skill you can learn in a couple of weeks of steady practice. This guide walks you through it in eight steps, using Adobe's own instructions and the shortcuts Illustrator ships with.
In the next few minutes you'll learn:
- What anchor points, segments and direction handles actually do
- The eight drawing steps, from a straight line to a corner between two curves
- The keys that save you from starting a path over
- When the Curvature tool or Image Trace is the smarter choice
- The habits that separate clean vector logos from messy ones
What Does the Pen Tool in Illustrator Actually Draw?
The pen tool in Illustrator draws paths. A path is a chain of anchor points joined by segments. Each anchor marks where a segment starts or ends, and the segment between two anchors is either straight or curved.
Curves come from direction handles, the thin lines with round tips that appear when you drag instead of click. The angle of a handle sets the direction the curve leaves the anchor. Its length sets how far the curve bulges before it bends toward the next point.
There are two kinds of anchors you'll work with every day:
- Smooth points have two handles locked in a straight line, so the path flows through without a kink. Think of the round belly of the letter "S".
- Corner points have handles that move independently, or no handles at all, so the path changes direction sharply. Think of the tip of a leaf or the corner of a box.
Once you see every logo as a set of smooth and corner points, the pen tool in Illustrator stops feeling random. You're just deciding, point by point, which kind you need.
Pen Tool in Illustrator: The Keys You'll Press Most
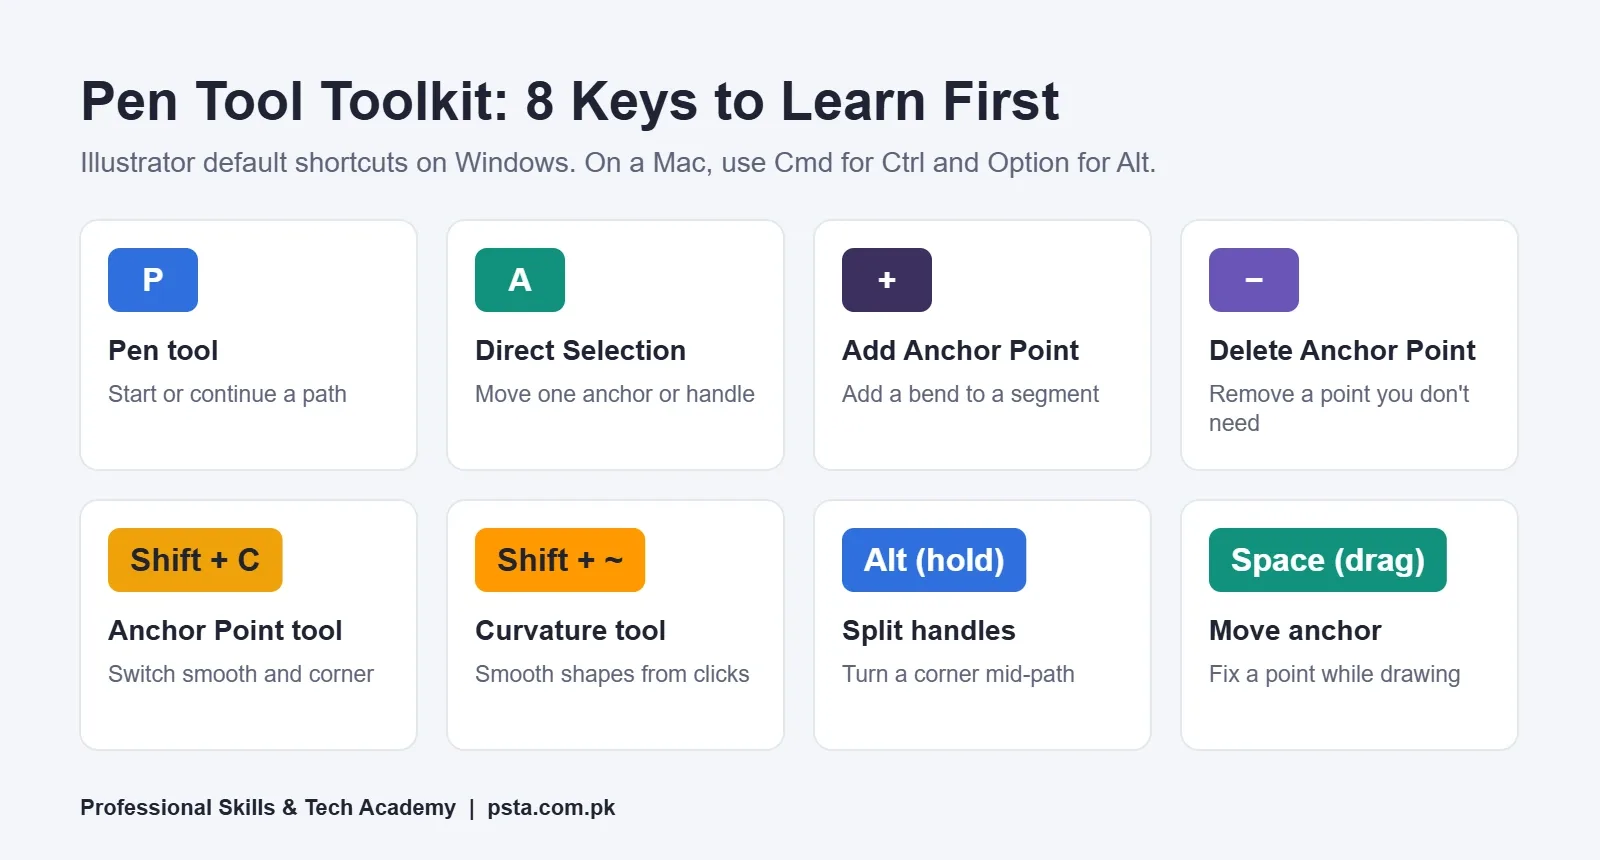
You'll draw faster if your left hand stays on the keyboard. These Illustrator pen tool shortcuts are the Windows defaults listed in Adobe's keyboard shortcuts reference. On a Mac, swap Ctrl for Command and Alt for Option.
| Key | What It Does | When You Need It |
|---|---|---|
| P | Pen tool | Start or continue a path |
| + (plus) | Add Anchor Point tool | A curve needs one more bend |
| - (minus) | Delete Anchor Point tool | A path has a point it doesn't need |
| Shift + C | Anchor Point tool | Convert a smooth point to a corner, or back |
| Shift + ~ | Curvature tool | Sketch smooth shapes with clicks only |
| A | Direct Selection tool | Move one anchor or one handle |
| Alt (hold) | Temporary Anchor Point tool | Split handles in the middle of drawing |
| Spacebar (drag) | Moves the current anchor | You placed a point slightly off |
| Ctrl + J | Join | Connect two open ends |
| Ctrl + Y | Outline view toggle | Inspect the bare paths without color |
Don't try to memorize all ten on day one. Learn P, A, Alt and Spacebar first, since those four cover most corrections you'll make while drawing.
Step 1: Set Up a Practice File Before You Draw
A clean setup removes half the confusion beginners feel. Adobe's own pen tool exercises start the same way.
- Create a new document at any size and place the image you want to trace with File > Place.
- Lock that image with Ctrl + 2 so a stray click can't move it.
- Press D to reset to a black stroke and white fill, then set the fill to None. With no fill, you can see the template under your path.
- Turn off Smart Guides from the View menu. They're useful later, but they make points snap where you didn't intend while you're learning.
- Pick a bright stroke color, such as red at 1 pt, so your path stands out against the template.
If you don't have a logo to trace yet, start with simple shapes: a box, a trailer outline, a car. That's the order Adobe's exercises follow, and it works.
Steps 2 and 3: Draw Straight Lines, Then Close the Path
Straight segments are the easiest place to start with the pen tool in Illustrator because you only click. Adobe's guide to drawing with the Pen tool and its practice exercises give this routine:
- Press P and click once, without dragging, where the shape should begin. Nothing appears yet.
- Click where the first side ends. A straight segment appears between the two anchors.
- Keep clicking at each corner. Hold Shift as you click to keep a line perfectly horizontal or vertical, or to snap a diagonal to 45 degrees.
- To close the shape, hover over the first anchor. When a small circle appears beside the pointer, click.
Sometimes you want an open path instead, like a single line under a shop name. To stop drawing without closing it, Ctrl-click on an empty area away from the path, switch to another tool, or choose Select > Deselect.
This last part trips up many students. If you don't end the open path, your next click continues the old one, and you get a long line shooting across the artboard. Make Ctrl-click a reflex.
Step 4: How Do You Draw a Smooth Curve?
Curves with the pen tool in Illustrator need one change in your hand: you press and drag instead of clicking. The drag pulls out direction handles.
- Press the mouse where the curve starts and drag in the direction the curve should travel. Release.
- Move to where the curve should end.
- For a C-shaped curve, drag in the opposite direction to the previous handle. For an S-shaped curve, drag in the same direction.
- Keep placing and dragging to add more smooth segments.
Two habits make curves look professional. First, drag along the direction of the shape, not toward the next point. Second, keep handles short. Adobe's exercise notes say plainly that if a curve bulges too far, the handle is too long, so shorten it.
If you need the two handles on one smooth point to have different lengths, hold Ctrl while you drag. The point stays smooth, but one side of the curve can be gentle while the other side is tighter. That's common in lettering, where a stroke thickens on one side.
Steps 5 and 6: Corners Between Curves and Straight Exits
Real logos mix curves and corners. A leaf has two curved sides that meet at a sharp tip. A speech bubble has round sides and a straight tail. Two techniques handle both cases.
Step 5: Turn a Corner Between Two Curves
Adobe's page on curved segments connected by a corner describes this sequence:
- Drag to set the first smooth point, then drag again to finish the first curve.
- Hold Alt and drag the forward handle of that second point toward where the next curve should go. The handles split, and the smooth point becomes a corner.
- Release Alt, move to the end of the second curve and drag to place the next point.
Step 6: Go From a Curve to a Straight Line
When a straight segment follows a curve, the forward handle on the last point would bend your straight line. Adobe's steps for curves followed by straight lines fix that:
- Finish the curve by dragging at its end point.
- Hover over that same end point until the convert-point icon appears, then click it once. The forward handle disappears.
- Click where the straight segment should end.
The same idea works in the middle of drawing: Alt-click a point to remove its handle when the next segment needs to be straight.
Step 7: Edit Anchors Without Starting Over
Nobody places every point perfectly the first time, even after years with the pen tool in Illustrator. The skill is fixing a path quickly instead of deleting it and redrawing.
- Point placed slightly off while drawing? Keep the mouse button down, hold Spacebar and drag. The anchor moves with you, and you can release Spacebar once it sits in the right place.
- Curve wrong after you've finished? Press A for Direct Selection, click the anchor, and drag the anchor or its handle.
- Need an extra bend? Press + and click on the segment.
- Too many points? Press - and click the extra anchor. The path stays connected.
- Smooth point that should be a corner? Press Shift + C and click it.
A practical tip from our design classes: zoom in before you edit. At 400% or more, you'll see small kinks and overlapping handles that look fine at 100% but show up clearly on a large flex print.
Step 8: Simplify, Join and Check in Outline View
Before a vector logo leaves your computer, give every path a final inspection. Three commands do most of the work.
- Simplify. Select the path and choose Object > Path > Simplify. Adobe's Simplify paths page explains that Auto-Simplify removes unnecessary anchor points and smooths the path. Check the result against your template, since it can soften details you wanted sharp.
- Join. If two open ends should meet, select both paths and press Ctrl + J.
- Outline view. Press Ctrl + Y to see only the bare paths. Stray points, gaps and paths hidden behind other shapes become obvious. Press it again to return to the colored view.
Print shops in Pakistan often cut vinyl stickers and signboard letters straight from your file, so a hidden stray point can become a real cut on real material. Outline view takes 30 seconds and saves a reprint.
Pen, Curvature or Image Trace: Which Should You Use?
The pen tool in Illustrator isn't the only way to make vector shapes, and choosing well saves hours.
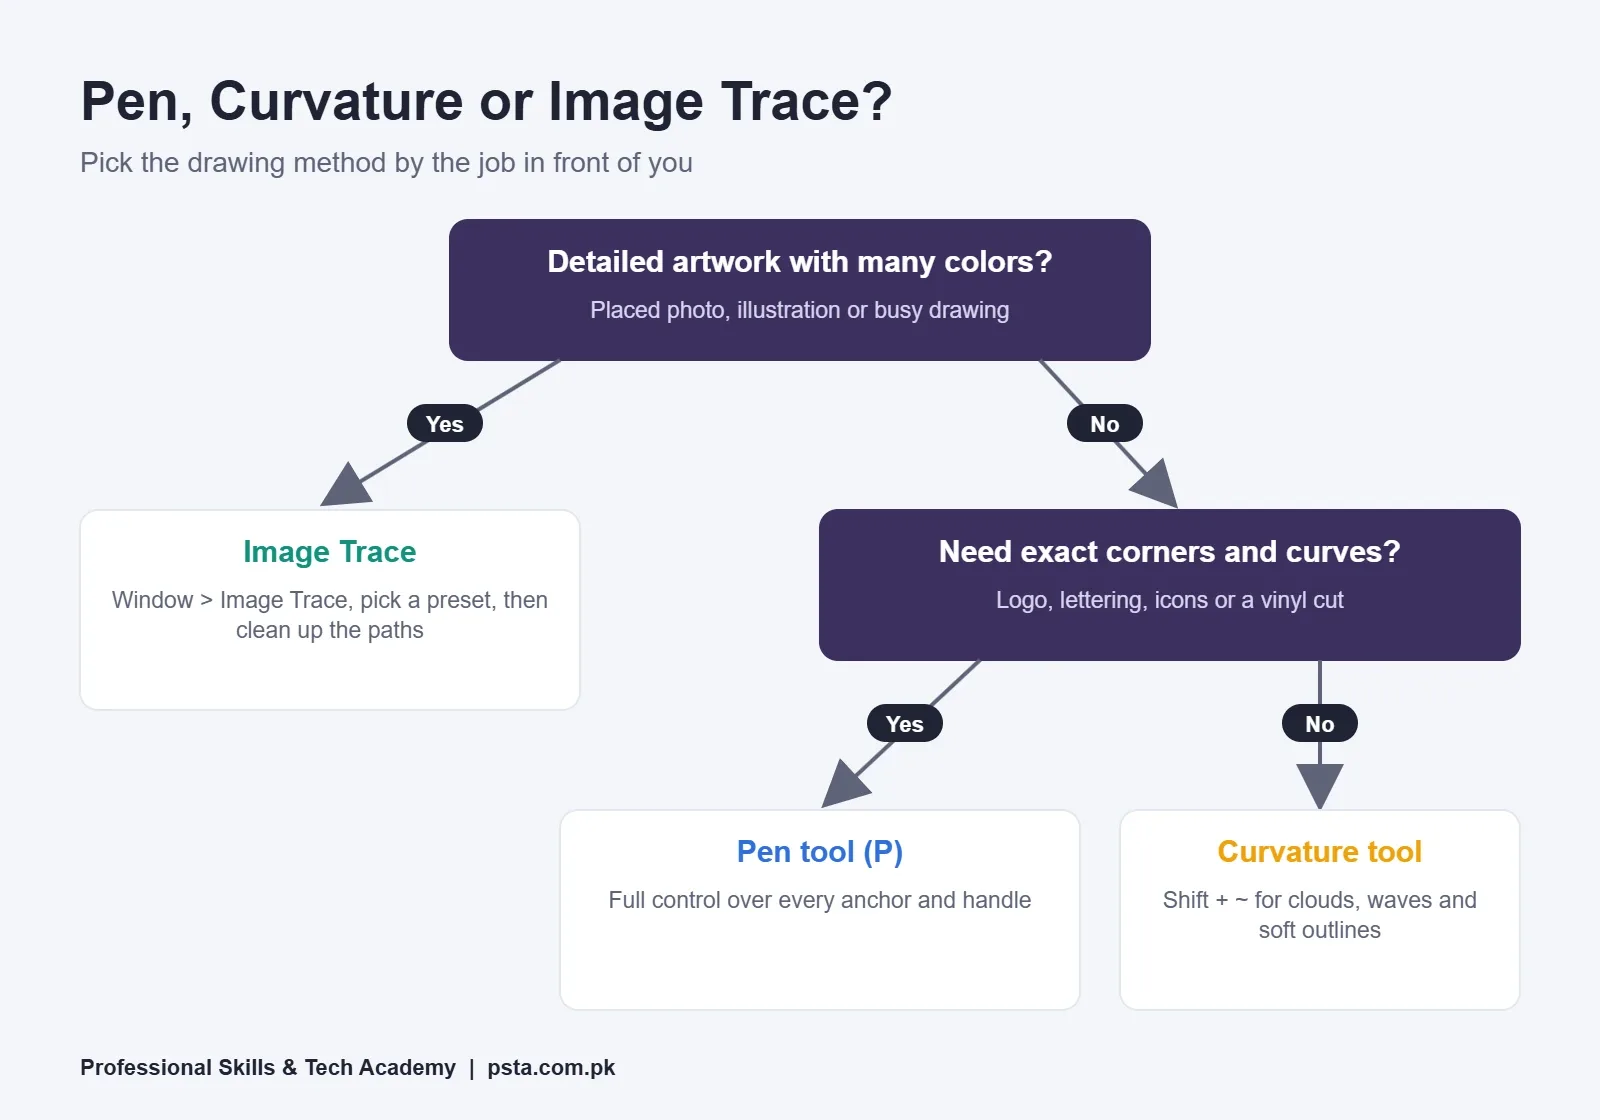
The Curvature tool (Shift + ~) builds smooth shapes from clicks alone. Adobe's guide to the Curvature tool says a single click makes a smooth point, a double-click makes a corner point, and selecting a point and pressing Delete removes it while keeping the curve. Press Esc to stop drawing. It suits organic shapes like clouds, waves and mascot outlines.
Image Trace converts a placed raster image into vector paths automatically. Adobe's Image Trace guide covers the workflow: place the image, open Window > Image Trace and pick a preset. It's quick for detailed artwork with many colors, but the paths usually need cleanup before they're fit for a logo.
The pen tool wins when you need exact control over every corner and curve. That covers logos, Urdu and English lettering, icons and anything that will be cut on a vinyl plotter.
Many working designers combine them. They trace a complex illustration, sketch soft areas with the Curvature tool, and redraw the logo mark and text with the pen tool.
Mistakes That Make Pen Paths Look Amateur
When we review beginner logo files drawn with the pen tool in Illustrator, the same problems come up again and again. Most of them are habits, and habits change with a little attention.
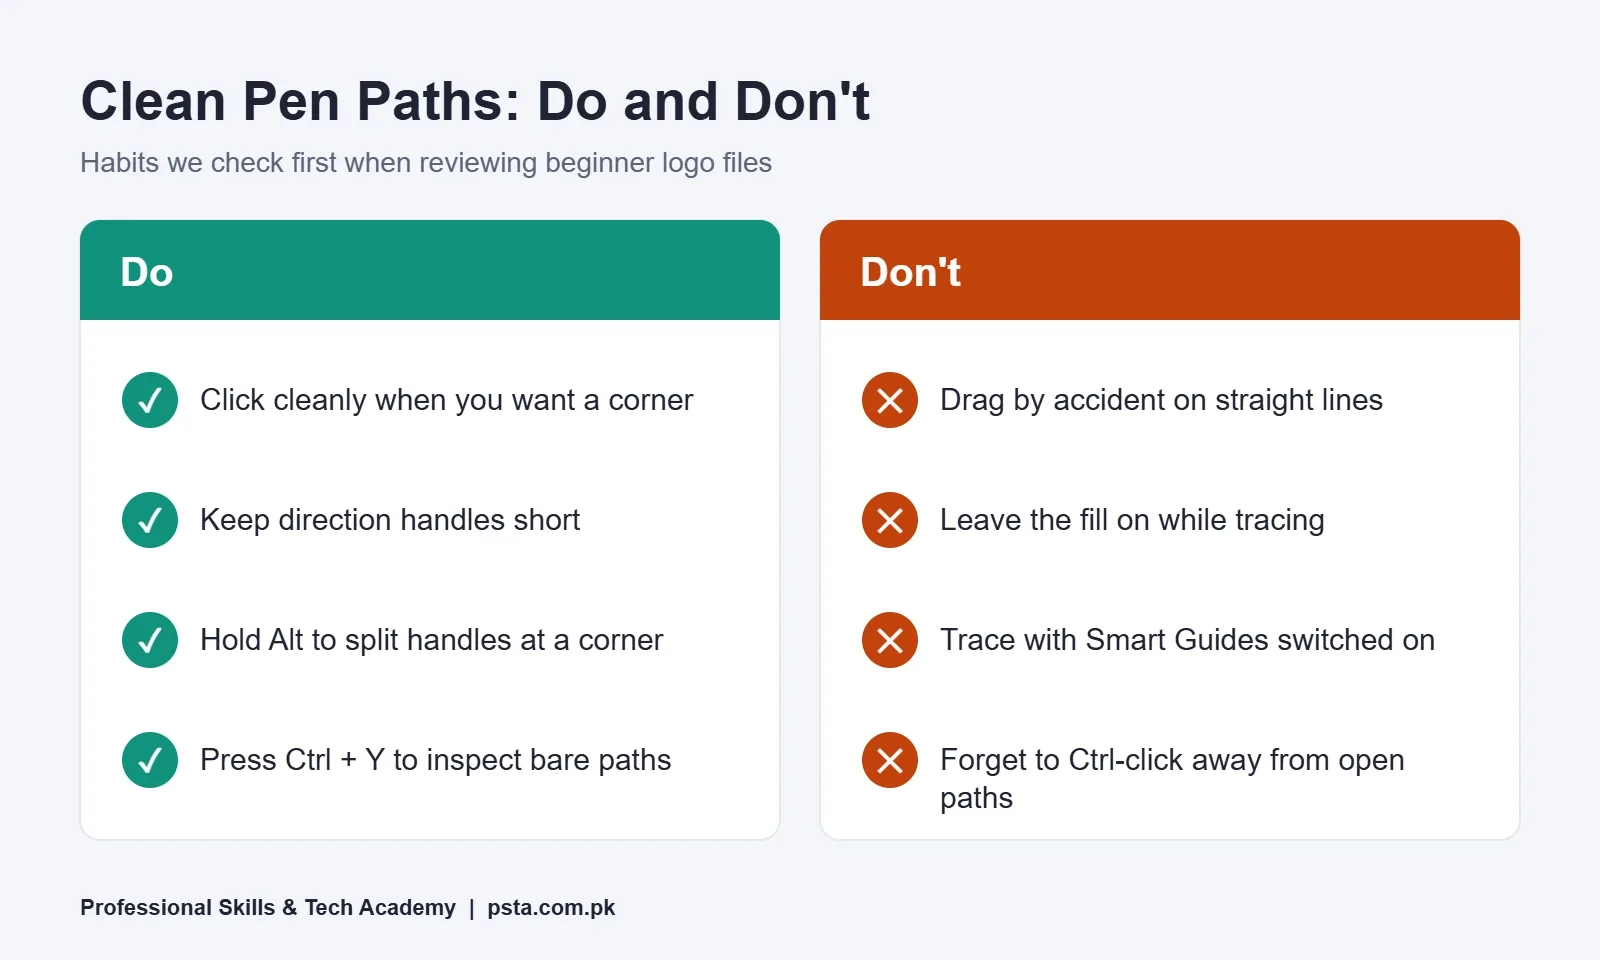
- Dragging when you meant to click. A tiny accidental drag adds handles, so your "straight" line has a faint curve. Click cleanly for corners.
- Handles that are far too long. Long handles make curves overshoot and wobble. Shorten them until the curve sits on the template.
- Too many anchor points. Twenty points on a simple circle-like curve create bumps. Fewer, well-placed points give smoother lines, and Simplify can help.
- Forgetting to end an open path. The next click continues the old path. Ctrl-click away first.
- Leaving the fill on while tracing. A white fill hides the image underneath. Set the fill to None until the shape is finished.
- Tracing with Smart Guides on. Points snap to nearby objects instead of the template edge. Turn them off for tracing practice.
Practicing the Pen Tool in PSTA's Graphic Designing Course
If you'd like guided practice instead of learning alone, the pen tool in Illustrator is a core part of PSTA's Graphic Designing course. Week 3 is Adobe Illustrator for beginners, covering logos, icons and typography, and the brand identity project asks you to build a logo in Illustrator with a color palette, business card and letterhead.
The course runs for 12 weeks at beginner level and also covers Photoshop, CorelDRAW, Canva and Urdu design in InPage. The fee is Rs. 18,000 (regular Rs. 20,000), payable in 2 installments. You can study at the Abbottabad campus in Mandian, join live online from any city, or mix both. Online sessions are recorded, so you can replay a tricky pen tool demo as often as you like.
Before you enroll, two earlier guides are worth a read: our logo design process walkthrough shows where vector drawing fits in a client project, and graphic design software for beginners helps you decide which programs to install first. You can compare every program on the courses page or apply through the admission form.
Today's Exercise: Redraw One Shop Sign
Take a phone photo of a simple sign near your home, such as a pharmacy cross, a mobile shop name or a tea stall logo. Place it in Illustrator, lock it, and redraw it with the pen tool in Illustrator using only the eight steps above. Aim for the fewest points that still match the shape.
Then press Ctrl + Y and count your anchors. Redraw the same sign tomorrow and try to use fewer. After a week of this, curves that felt awkward will start to feel natural, and you'll have the beginnings of a portfolio piece. When you're ready to show your work to clients, our list of graphic design portfolio mistakes will help you present it well.
Frequently asked questions
What is the shortcut for the pen tool in Illustrator?
Press P to select the Pen tool in Illustrator. Related keys are + for the Add Anchor Point tool, - for the Delete Anchor Point tool, Shift + C for the Anchor Point tool and Shift + ~ for the Curvature tool. These are the default shortcuts on Windows. On a Mac they are the same letters, and Ctrl becomes Command.
Why does my pen tool keep connecting to the last path?
Illustrator keeps an open path active until you end it, so your next click adds to the old line. To stop, Ctrl-click (Command-click on a Mac) on an empty area, switch to another tool, or choose Select > Deselect. Then start the new path with a fresh click.
How do I draw a straight line after a curve with the pen tool?
After you drag to finish the curve, hover over that same end point until the convert-point icon appears, then click it once. This removes the forward handle. Now click where the straight segment should end, and the line will stay straight instead of bending.
Is the Curvature tool easier than the pen tool for beginners?
Many beginners find it gentler because you only click: a click makes a smooth point and a double-click makes a corner. It works well for soft, flowing shapes. For logos and lettering with exact corners, the pen tool gives more control, so it is worth learning both.
How do I delete an anchor point without breaking the path?
Use the Delete Anchor Point tool by pressing the minus key, then click the point. The path stays joined and reshapes around the missing point. With the Curvature tool, select the point and press Delete. Avoid pressing Delete with a point selected by Direct Selection, since that can cut the path.
Should I use Image Trace instead of drawing a logo with the pen tool?
Image Trace is quick for busy artwork with many colors, but traced paths often have extra points and uneven edges. For a logo that must print sharply on banners, cards and vinyl, redrawing it with the pen tool usually gives cleaner, lighter files. Some designers trace first, then redraw the key parts.
Sources & references
- Draw curves with the Pen tool (Adobe Help) helpx.adobe.com
- Draw two curved segments connected by a corner (Adobe Help) helpx.adobe.com
- Draw curves followed by straight lines (Adobe Help) helpx.adobe.com
- Default keyboard shortcuts in Illustrator (Adobe Help) helpx.adobe.com
- Draw shapes with the Curvature tool (Adobe Help) helpx.adobe.com
- Simplify paths (Adobe Help) helpx.adobe.com
- Practice creating with the Pen tool (Adobe Learn) adobe.com
- Trace images to convert raster into vector artwork (Adobe Help) helpx.adobe.com
Last reviewed & updated on by Umar Qureshi. Written by the PSTA team in Abbottabad, Pakistan.

Umar Qureshi

Ultimate Graphic Designing Course in Pakistan: Master Photoshop, Illustrator, CorelDRAW & AI Tools (Practical & Beginner Friendly)
Turn this guide into a career: hands-on training with real projects, online across Pakistan or on-campus in Abbottabad · 12 Weeks.



Comments
No comments yet — ask a question or share your experience.