Quick answer
Start with three precision drills: an A3 title block template, a flange gasket plate and a spanner. Move on to orthographic and isometric views, a block library and an electrical layout. Finish with a house plan, elevation and section, a staircase detail and a simple 3D model, then combine your best five or six sheets into one PDF portfolio.
Key takeaways
- • Work through 10 projects in three levels, each adding one new skill.
- • Pakistani drafter job ads ask for plans, elevations, sections and working drawings, not command lists.
- • Build every sheet on one A3 template and plot it from a layout at a stated scale.
- • Lead your portfolio PDF with the house set, staircase detail and 3D model.
- • The Autodesk Certified User objectives cover most skills these projects drill.
Table of contents 22 sections
- What Makes a Good AutoCAD Practice Project?
- What Do Employers in Pakistan Look For in a Drafting Portfolio?
- Before You Start: Software, Units and a Template
- AutoCAD Projects for Beginners at a Glance
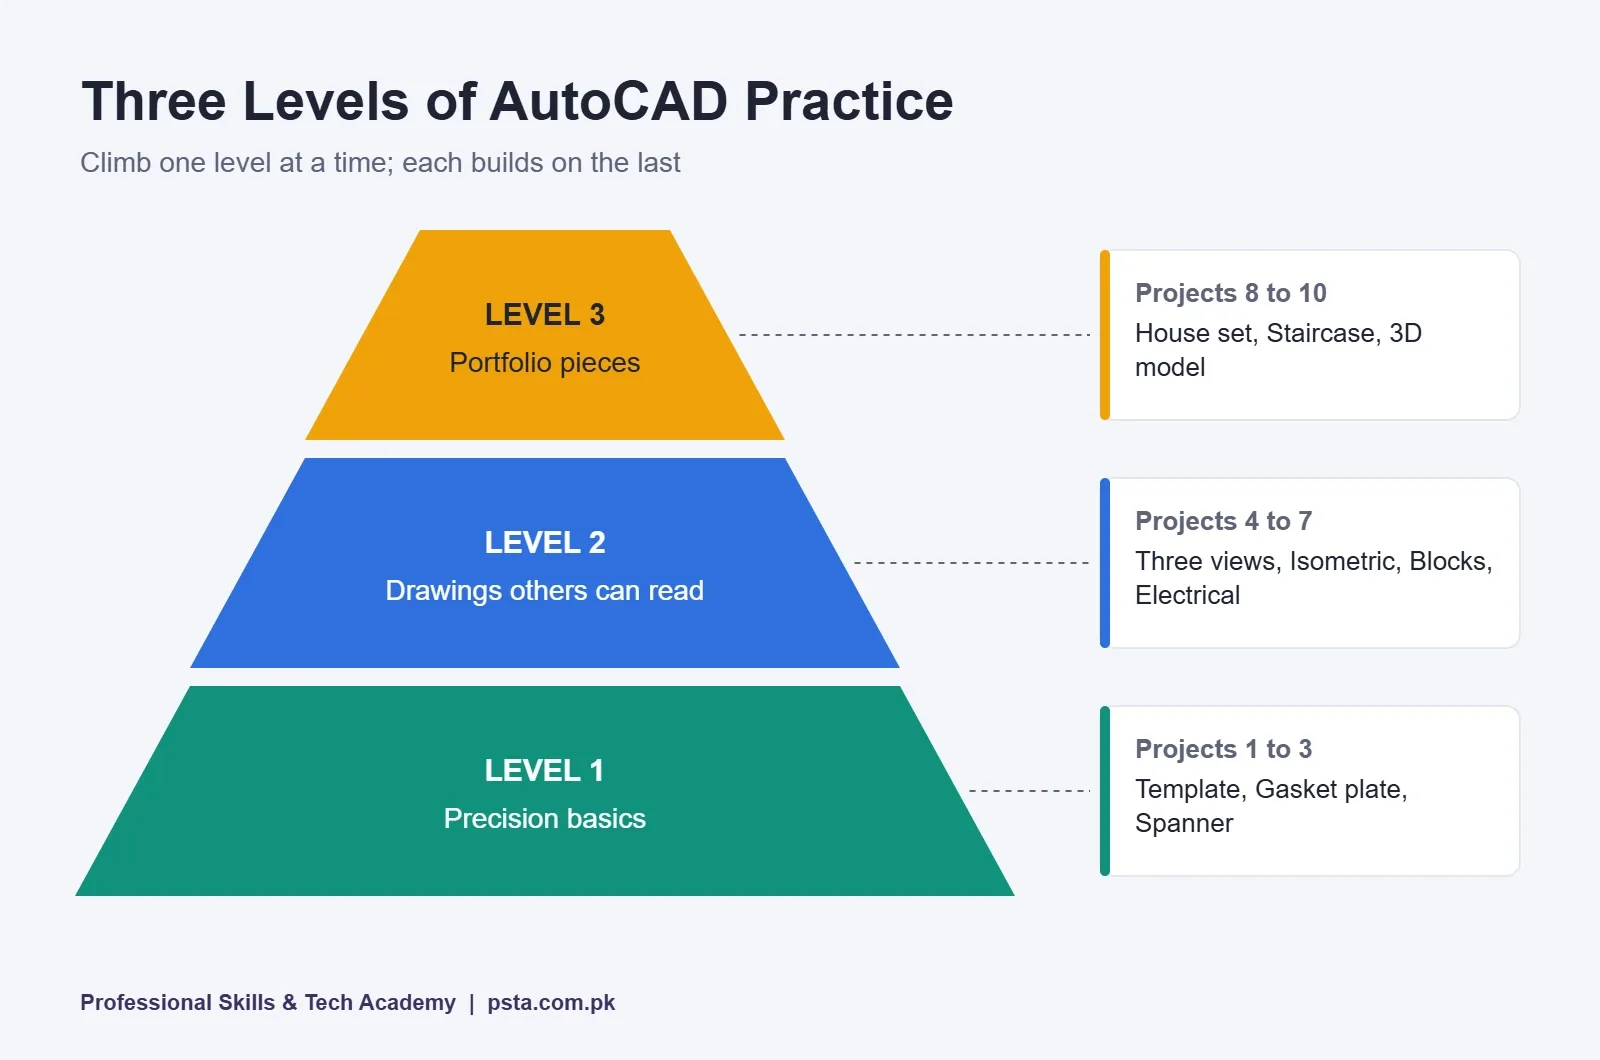
- Level 1 Projects: Precision Basics
- Project 1: A3 Sheet Template With Title Block
- Project 2: Flange Gasket Plate
- Project 3: Open-End Spanner
- Level 2 Projects: Drawings Other People Can Read
- Project 4: Three Views of a Machine Block
- Project 5: Isometric View of the Same Block
- Project 6: Furniture and Fixture Block Library
- Project 7: Electrical Layout of a Bedroom
- Level 3 Projects: Portfolio Pieces
- Project 8: House Plan, Elevation and Section
- Project 9: Dog-Legged Staircase Detail
- Project 10: 3D Model of a Room or a Machine Part
- How Should You Present These Projects in a Portfolio?
- Which Mistakes Make Practice Drawings Look Amateur?
- Do These Projects Prepare You for Autodesk Certification?
- Practising These Projects With PSTA's AutoCAD Course
- Pick One Project and Finish It This Week
Before you go looking for AutoCAD projects for beginners, give yourself a two-minute test. Could you draw a 120 mm steel plate with six bolt holes spaced evenly on a 90 mm circle, dimension it, and print it to scale on an A4 sheet without guessing at any step? If you hesitated at the bolt holes or the printing, you're in the right place.
Most beginners know dozens of commands but have never finished a drawing someone else could use. The ten AutoCAD projects for beginners below fix that. They start with a sheet template and end with a small set of house drawings and a 3D model, so each one adds a skill the next one needs.
By the end of this guide, you'll have:
- Ten AutoCAD practice drawings sorted into three levels, with the commands each one drills
- A clear idea of what Pakistani firms ask for in AutoCAD drafter job ads
- A way to turn finished drawings into a short PDF portfolio
- The mistakes that make practice work look amateur, and how to avoid them
- A sense of how these projects line up with Autodesk's entry-level certification
What Makes a Good AutoCAD Practice Project?
A good practice project has a real purpose, and that's what separates useful AutoCAD projects for beginners from busywork. A random shape copied from a worksheet teaches you a command. A gasket that a workshop could cut, or a room layout an electrician could wire from, teaches you how drawings are actually used.
Look for three things in every exercise you choose:
- Exact sizes. Every line should come from a typed distance, a coordinate or an object snap. If you eyeball anything, the drawing is a sketch.
- A finished output. The project ends with a dimensioned sheet printed or saved to PDF at a stated scale, not with lines floating in model space.
- One new skill. Each project should stretch you a little. Repeating what you already know feels productive but adds nothing to your portfolio.
Keep every file. Your first gasket will look clumsy next to your tenth drawing, and that difference is useful when you talk to an employer about how you learn.
What Do Employers in Pakistan Look For in a Drafting Portfolio?
Ads for AutoCAD drafter jobs are the best guide to what your practice should produce. Two recent listings on Rozee.pk show the pattern clearly.
An AutoCAD drafter role in Islamabad, posted in October 2026 for A & K Builders, asked for 2 to 3 years of experience, mainly 2D drafting, and a DAE in civil, architecture or a related field. The duties were floor plans, elevations, sections and working drawings, plus turning rough sketches into detailed drawings. It listed a salary of Rs. 70,000 to Rs. 100,000 a month, depending on experience. Revit or SketchUp were preferred but not required.
A draftsman role at an architecture firm in Lahore, posted in November 2026, asked for a strong portfolio showing architectural and interior drafting, along with knowledge of construction details and drafting standards.
Notice what both ads leave out. Neither asks for a long list of commands. They ask for drawings: plans, elevations, sections and details that a site team can build from. That's why the AutoCAD projects for beginners in this guide end with complete sheets rather than isolated exercises.
Both roles also wanted experience. As a fresher, your portfolio is how you show you can already do the daily work, so the quality of a few finished sets matters more than the number of files.
Before You Start: Software, Units and a Template
You need a working copy of AutoCAD and a computer that can run it smoothly. On price, Autodesk's AutoCAD subscription FAQ lists $260 a month or $2,095 a year for one user, and notes that pricing varies by region. The same page says students and teachers at qualified institutions can get free one-year access through the Autodesk Education Community, renewable, but not for commercial work. Our guide on getting AutoCAD free as a student walks through that sign-up.
If your laptop struggles, read our notes on choosing a laptop for AutoCAD before you buy anything.
Then settle two habits before Project 1:
- Units. Use millimetres for mechanical parts. For house plans, use feet and inches if that's what your firm or client works in. Set this with the UNITS command at the start of each file.
- Layers. Create named layers for outlines, centre lines, hidden lines, dimensions and text. If layers still confuse you, our AutoCAD layers guide covers naming and colours in detail.
AutoCAD Projects for Beginners at a Glance
Here are all ten AutoCAD projects for beginners in order. The time estimates are rough guides for a beginner practising about an hour a day, not fixed targets.
| # | Project | Level | Main Skills | Rough Time |
|---|---|---|---|---|
| 1 | A3 sheet template with title block | 1 | Units, layers, text styles, rectangle | 1 to 2 days |
| 2 | Flange gasket plate | 1 | Circles, OFFSET, polar array, centre lines | 1 to 2 days |
| 3 | Open-end spanner | 1 | Polygon, TRIM, FILLET, MIRROR | 2 days |
| 4 | Three views of a machine block | 2 | Object snap tracking, hidden lines | 3 days |
| 5 | Isometric view of the same block | 2 | Isometric drafting, ellipses | 2 days |
| 6 | Furniture and fixture block library | 2 | BLOCK, attributes, INSERT | 3 days |
| 7 | Electrical layout of a bedroom | 2 | Symbols, polylines, legend | 2 to 3 days |
| 8 | House plan, elevation and section | 3 | Projection between views, hatch | 1 to 2 weeks |
| 9 | Dog-legged staircase detail | 3 | Plan and section, annotation | 3 to 4 days |
| 10 | 3D model of a room or part | 3 | EXTRUDE, PRESSPULL, SUBTRACT | 1 week |
Level 1 Projects: Precision Basics
These three starter AutoCAD projects for beginners build the habit of exact input. Don't rush them. Speed comes later, and it only helps if the geometry underneath is right.
Project 1: A3 Sheet Template With Title Block
Draw a 420 x 297 mm border, then a title block with boxes for project name, drawing title, scale, date, drawn by and sheet number. Set up your layers and one or two text styles, then save the file as a DWT template.
It sounds boring. It's also the file you'll open for every later project, so a tidy template saves hours. Firms use their own templates, and showing you understand why they exist is a small but real plus in an interview.
Project 2: Flange Gasket Plate
This is the self-test from the top of the page. Draw a 120 mm outer circle and a 50 mm bore, add a 90 mm pitch circle on a centre-line layer, place one 10 mm bolt hole, then use ARRAYPOLAR to make six evenly spaced holes. Dimension the diameters and the pitch circle.
You'll also meet OFFSET here, which Autodesk's modify commands guide describes as making parallel copies at a set distance, which is handy for concentric circles and walls. One detail trips beginners up: on a closed shape, the side you click decides whether the copy is larger or smaller, as this OFFSET study note explains. Click inside the circle for a smaller copy.
Project 3: Open-End Spanner
Draw a 17 mm spanner: a hexagon for the jaw opening, two circles for the head, a straight handle, then TRIM away what you don't need. Round the joints with FILLET and use MIRROR to build one half from the other.
A useful trick from the same Autodesk guide: holding Shift while you pick the second object in FILLET gives a sharp corner instead of a curve. Keep a printed reference of real spanner sizes beside you and match it closely. Copying a real object teaches proportion in a way invented shapes don't.
Level 2 Projects: Drawings Other People Can Read
At this level, the question changes from "Is it accurate?" to "Could someone else work from it?" That means correct views, standard line types and clear annotation.
Project 4: Three Views of a Machine Block
Pick a simple stepped block with one slot and one drilled hole. Draw the front view first, then project the top and side views using object snap tracking so every edge lines up. Show hidden edges with a dashed linetype on their own layer.
This is the project that makes orthographic projection click. If you studied engineering drawing on paper, you'll notice how much faster tracking lines are than a T-square.
Project 5: Isometric View of the Same Block
Turn on isometric drafting (the ISODRAFT command or the status bar toggle) and draw the block from Project 4 as a 3D-looking 2D sketch. Holes become isometric ellipses, so use the Isocircle option of the ELLIPSE command.
Drawing the same part twice is deliberate. You check your isometric against your three views, and mismatches show you exactly where your reading of the part went wrong.
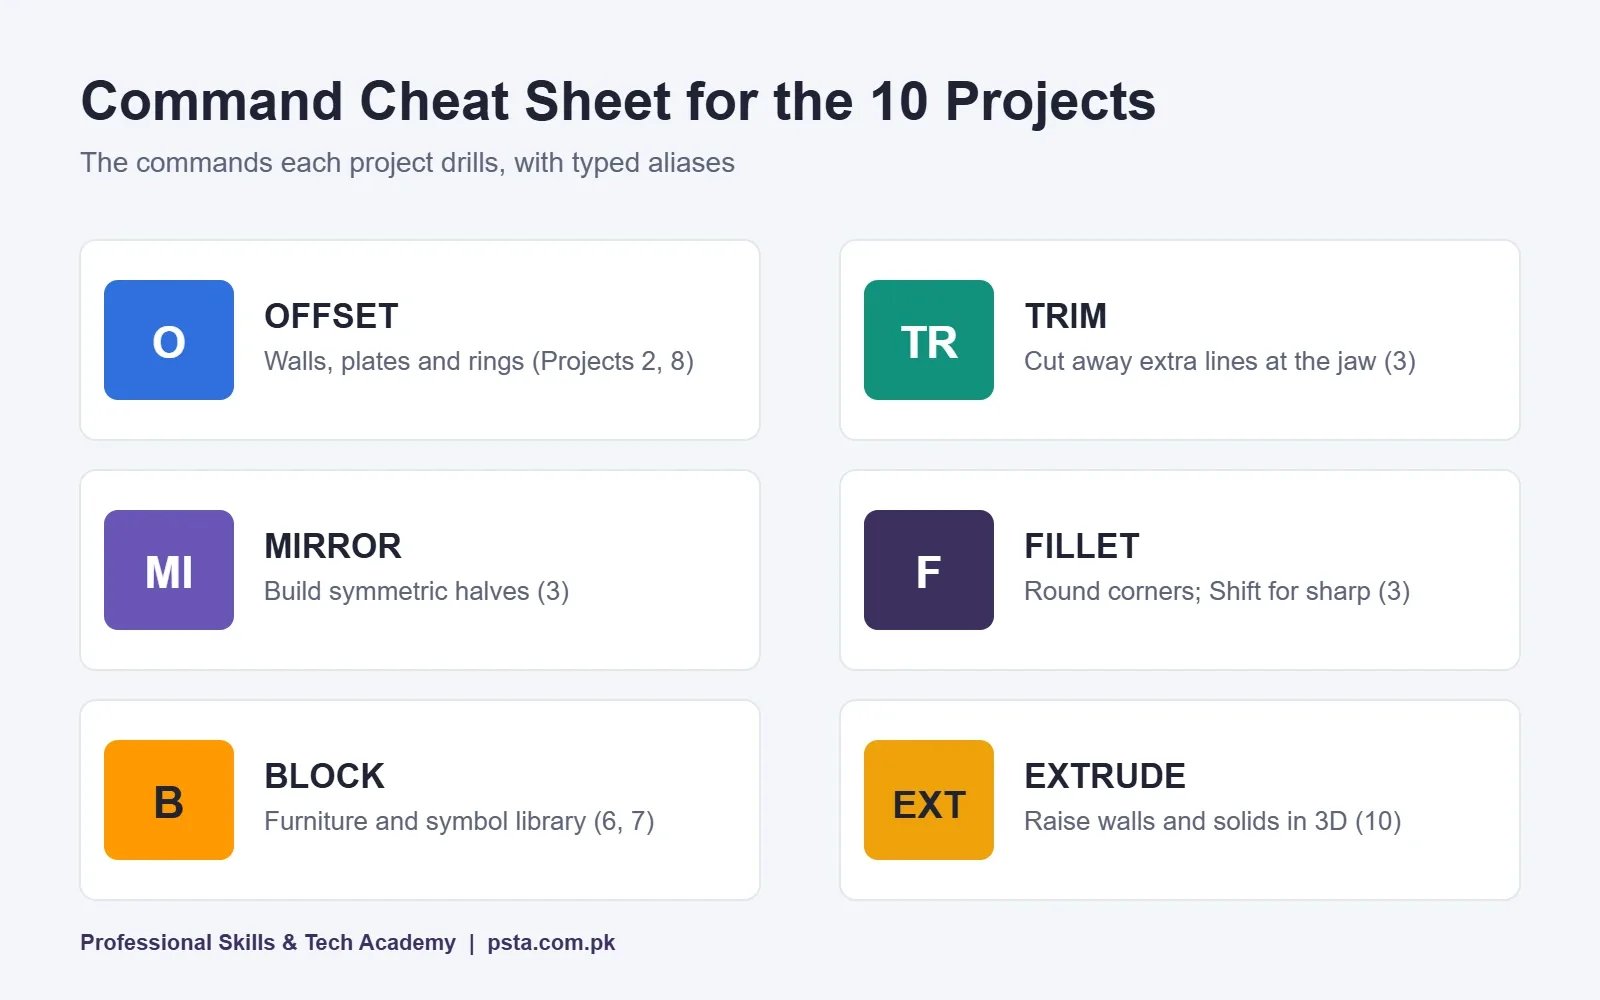
By now you should be typing short aliases instead of clicking ribbon icons: O for OFFSET, TR for TRIM, MI for MIRROR, F for FILLET, B for BLOCK and EXT for EXTRUDE. The cheat sheet below links each one to the projects where you'll use it most.
Project 6: Furniture and Fixture Block Library
Draw a door swing, a window, a single bed, a double bed, a dining table, a WC and a wash basin at real sizes. Turn each into a block, and add an attribute such as a size tag to the door and window so you can fill in values when you insert them.
Save the blocks in one file. You'll insert them in Project 8 instead of drawing furniture again, which is exactly how offices work with their own standard libraries.
Project 7: Electrical Layout of a Bedroom
Take a 12 x 14 ft bedroom and place light points, a fan point, switchboards and sockets. Draw wiring runs as polylines on their own layer, and add a legend that explains every symbol. Our guide to electrical symbols is a good reference for standard shapes.
This project shows range. Many building firms want drafters who can handle more than architectural plans, and it also suits students heading toward panel and wiring work in our industrial automation course.
Level 3 Projects: Portfolio Pieces
These are the AutoCAD projects for beginners you'll show employers first. Give them more time than you think they need, and plan to revise each one at least once after a break.
Project 8: House Plan, Elevation and Section
Start from a floor plan of a small house. If you haven't drawn one yet, our step-by-step 5 Marla house plan guide covers walls, openings and dimensions. Then go further than the plan: project a front elevation from it, and cut one section through the stairs or a bathroom showing floor levels, slab and roof.
The Islamabad job ad above listed exactly this trio: floor plans, elevations and sections. A matched set where the window heights in the elevation agree with the section is far more convincing than three unrelated drawings.
Project 9: Dog-Legged Staircase Detail
Choose a floor height, work out a sensible number of risers and tread width, then draw the stair in plan and in section. Label the risers, treads, landing and handrail height, and hatch the concrete in the section.
Stair details expose sloppy drafting quickly, because every riser must match. That's why a clean one says a lot about your care with numbers.
Project 10: 3D Model of a Room or a Machine Part
Choose either the bedroom from Project 7 or the block from Project 4. Use EXTRUDE and PRESSPULL to raise walls or solids, SUBTRACT to cut openings and holes, then set a camera view and apply simple materials.
Keep it modest. One clean 3D view shows you understand the step from 2D to 3D. Heavy rendering belongs in tools built for that work.
How Should You Present These Projects in a Portfolio?
A portfolio is a short PDF, not a folder of DWG files. Many firms won't open source files at the first stage, and a PDF opens on any phone.
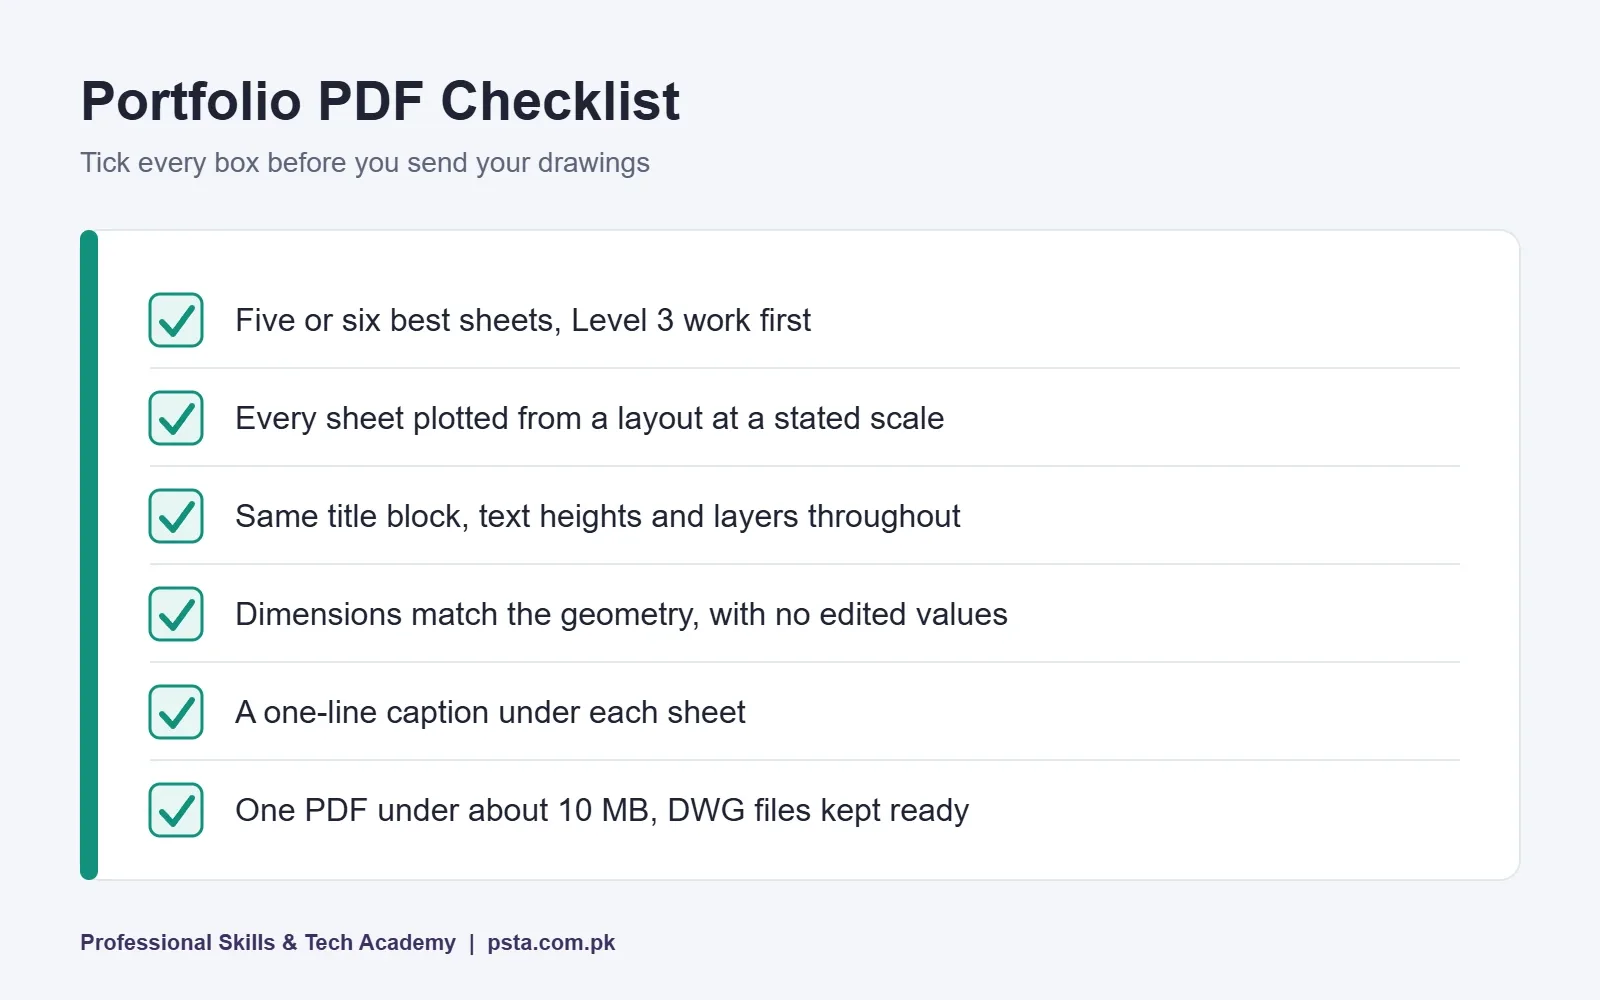
- Pick your best five or six sheets. Projects 8, 9 and 10 should lead, followed by one mechanical drawing and the electrical layout.
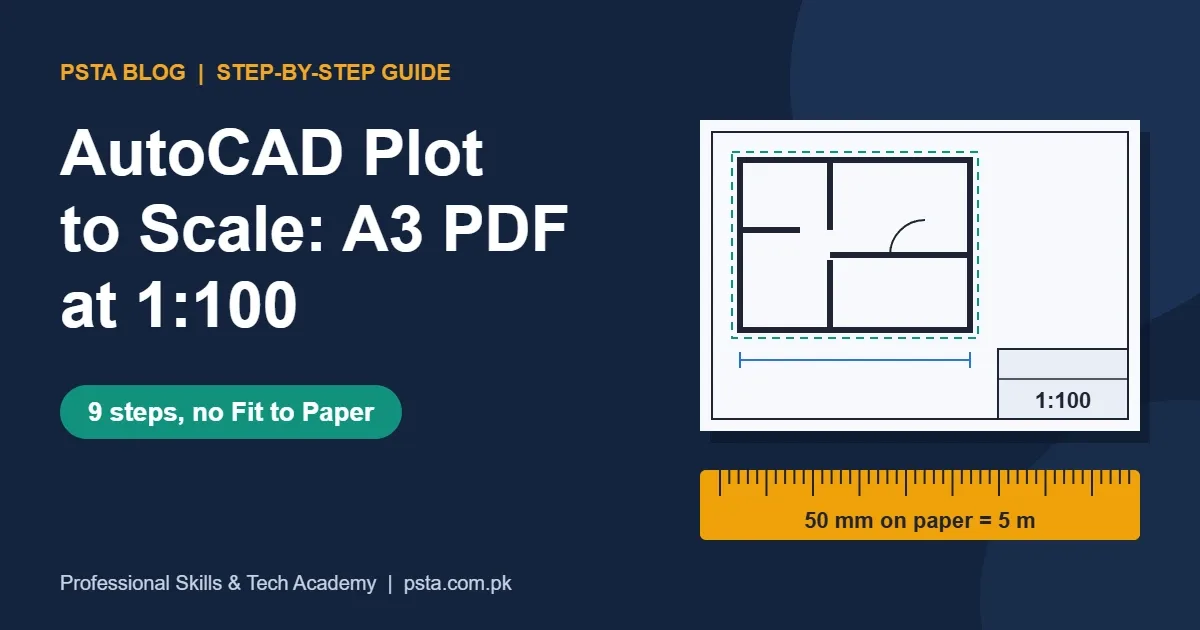
- Print each sheet from a layout tab to a stated scale, using your Project 1 template. Our guide on plotting to scale in AutoCAD explains viewports and scale settings.
- Add a one-line caption under each sheet saying what it is and which skills it shows.
- Combine everything into one PDF under about 10 MB so it uploads easily to job portals and WhatsApp.
- Keep the DWG files ready in case an interviewer asks you to open one and make a change on the spot.
Which Mistakes Make Practice Drawings Look Amateur?
Most weak portfolios fail on the same small things. Watch for these:
- Everything on layer 0. It tells a reviewer you haven't worked in a team file.
- Dimensions that don't match the geometry. Overriding a dimension's text to show a "nicer" number is the fastest way to lose trust.
- Mixed text heights. Pick two or three heights and stick to them on every sheet.
- No scale on the title block. A plan without a scale can't be measured on site.
- Copied drawings. Tracing a downloaded plan teaches little, and experienced reviewers often spot it. Change the room sizes and make the design yours.
Before any sheet goes into your PDF, zoom in to the corners and check for gaps, overlaps and stray lines. A five-minute review catches most of them.
Do These Projects Prepare You for Autodesk Certification?
These AutoCAD projects for beginners cover much of it. The Autodesk Certified User exam objectives for AutoCAD include drawing with accuracy, arrays, trim, offset, mirror, fillet, hatches, layers, inserting blocks, text, dimensions, and plotting options. The same document says the certification reflects about 150 hours of instruction and hands-on experience.
Projects 1 to 9 touch most of those areas. If you plan to sit the exam later, keep a note of which project covered which objective and revisit the weak ones before your test date.
A certificate helps, but in drafting interviews in Pakistan, a solid set of drawings usually carries more weight than a badge on its own.
Practising These Projects With PSTA's AutoCAD Course
If you'd like feedback while you work through these drawings, PSTA's AutoCAD Mastery course (2D, 3D design and BIM) follows a similar path. Its modules run from interface setup and 2D draw and modify commands through layers and dimensions, blocks and attributes, isometric and orthographic drawing, 3D solids, rendering, a final architectural or mechanical project, and portfolio building.
The course lasts 45 to 90 days and its fee page currently shows Rs. 28,000. Classes run in person in Mandian, Abbottabad (Old College Road, facing FIMS College), and live online for students elsewhere in Pakistan. A new batch starts every month.
See the full fee list on our courses page, or fill in the admission form when you're ready. If you have a question about which batch suits your timetable, send a short note to our team on WhatsApp (+92 314 5424399) and ask.
Pick One Project and Finish It This Week
Don't try all ten AutoCAD projects for beginners at once. Open a blank file today, build the A3 template from Project 1, and print it to PDF. Then draw the gasket plate on it before the week ends.
Two finished sheets will teach you more than a dozen half-done ones. Once you've got them, keep going down the list, and review our AutoCAD interview questions when your Level 3 drawings are ready to show.
Frequently asked questions
What should I draw first in AutoCAD as a beginner?
Start with an A3 sheet template that has a border, a title block, named layers and text styles. It takes a day or two and every later drawing sits on it. After that, draw a flange gasket plate with a polar array of bolt holes. It drills exact input, circles, offsets and dimensions in one short exercise.
How many AutoCAD projects do I need for a job portfolio?
Five or six finished sheets are usually enough for a first drafting job. Lead with a matched house plan, elevation and section, then add a staircase detail, a simple 3D view, one mechanical drawing and an electrical layout. A few complete, correctly scaled drawings make a stronger case than a long list of half-finished files.
Can I practise AutoCAD projects for free?
Autodesk says students and teachers at qualified institutions can get free one-year access through the Autodesk Education Community, and the access can be renewed. That licence is for learning, not paid client work. If you are not enrolled anywhere, Autodesk also offers a free trial of AutoCAD, which is enough to complete the first few projects.
Should I learn 2D or 3D AutoCAD first?
Learn 2D first. Drafting job ads in Pakistan mainly ask for 2D plans, elevations, sections and working drawings, and 3D modelling depends on the same precision habits. Once your 2D sheets are clean, a small 3D model of a room or machine part shows employers you can handle the next step.
How long does it take to finish these 10 AutoCAD projects?
At about an hour of practice a day, most beginners can work through all ten in roughly two to three months. The early drills take a day or two each, while the house set and the 3D model take a week or more. Revising your best sheets after a short break adds time but improves the result.
Do I need a certificate to get an AutoCAD drafting job?
A certificate can help your CV pass a first screening, but employers mainly judge drafters on their drawings and experience. The Autodesk Certified User exam covers many of the same skills these projects drill, so you can prepare for it alongside your portfolio rather than instead of it.
Sources & references
- AutoCAD Subscription FAQ (Autodesk) autodesk.com
- AutoCAD Web Help: Modify Commands (Autodesk) help.autodesk.com
- Autodesk Certified User AutoCAD Exam Objectives aud.edu
- Offsetting Objects study note (Open Exam Prep) open-exam-prep.com
- AutoCAD Drafter job, Islamabad (Rozee.pk) rozee.pk
- AutoCAD Draftsman job, Lahore (Rozee.pk) rozee.pk
Last reviewed & updated on by Umar Qureshi. Written by the PSTA team in Abbottabad, Pakistan.

Umar Qureshi

AutoCAD Mastery: 2D, 3D Design & BIM (Complete Professional Course)
Turn this guide into a career: hands-on training with real projects, online across Pakistan or on-campus in Abbottabad · 45 - 90 Days.

Comments
No comments yet — ask a question or share your experience.